Little more fab – leaf spring shackles
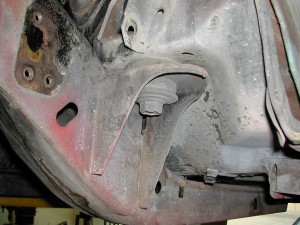
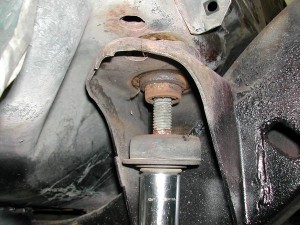
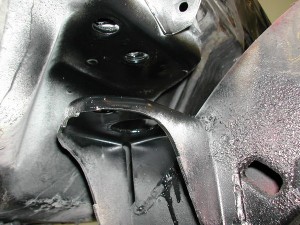
John made some more progress last week on the car. I’m actually very excited about the most recent thing completed – he was able to bring to life in steel, a part I’d only been able to visualize.
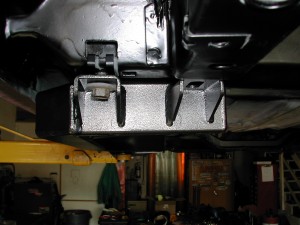
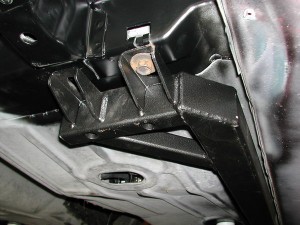
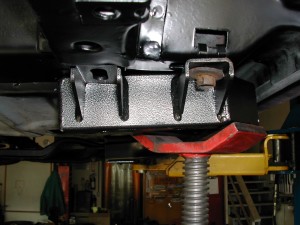
What part? Well, let’s just say this car will have the most kick-butt leaf spring shackles ever. 🙂
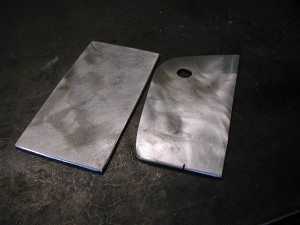
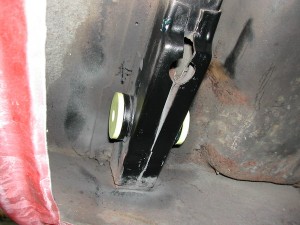
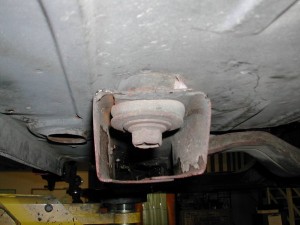
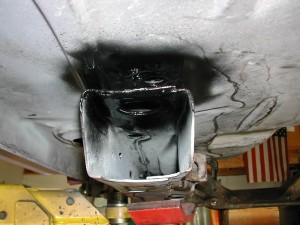
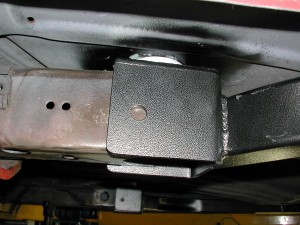
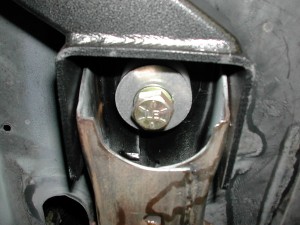
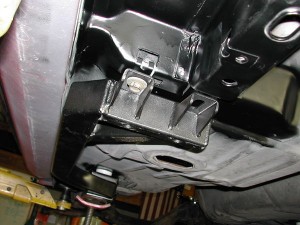
I don’t quite yet want to show the part, I’d like to wait until the car’s had its underside cleaned and painted so it’s all uniform. This is something of a hint though:
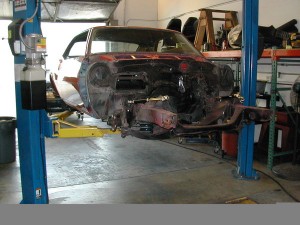
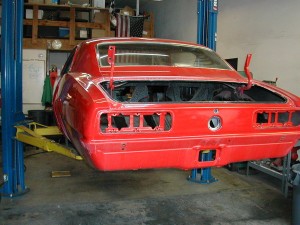
For the next couple weeks John’s been pulled into some other projects to the car’s on his back burner for a bit.
Staying sharp in the off-season – sim racing
The “sunshine tax” we Southern Californians pay affords us year-round opportunities for autocross and track days. Still, since I won’t have a car for a while, and there’s some free time while the car is out, decided to do a little more sim racing this winter.
There are several sims out there, the two I’m most familiar with are the SimBin GTR series of games (GTR2, GTR Evolution, Race07), and iracing.com.
The SimBin games are fun and a tremendous value – for $20-30, you’ve got unlimited access to 100+ awesome cars and dozens of neat tracks. Within a few minutes of installing, I was driving a Team Oreca Viper around the Nurburgring. Their Porsche 935 is by far the most fun sim car I’ve driven. You can download even more cars and tracks from sites like nogripracing.com. They also have a “Hot Laps” section, where people can post up their fastest laps, so you can see essentially the world record laps to compare to.
iracing.com is a little more hardcore. When you sign up you only get access to a small handful of cars, on an even smaller handful of tracks. The only real car you get when you start is a crappy Pontiac Solstice. You’ve got to keep paying a monthly fee, and you have to pay more every time you want to try a new car or a new track. Still, the simulation aspect of iracing is even better than the GTR games, which makes the subscription-based iracing a worthwhile endeavor for a few months in the off season. From within the iracing website, you can look up the world record laptimes for a given car on a given track, to compare to. No excuses here – with an average PC and wheel/pedal combo, you should be able to run with the very fastest guys in the world, once you’ve had some practice.
The sims always feel a bit cartoony and obviously the sensations are missing, but anecdotally it seems helpful. It helps you remember how to stay focused, how to stay smooth on your inputs, and if you race against other people, it even feels like a bit of exciting pressure at times. Some of my best driving in 2010 was the year’s first event – the San Diego Tour, when I hadn’t driven the Viper for 5 months, but had played a bunch of iracing after Santa brought a Logitech G27 wheel for Christmas.
Also, I look at a guy like Bryan Heitkotter. Bryan was already a really good autocrosser, then he got into iracing and rose to be one of the gods amongst its ranks. Meanwhile out in the real world, the guy is now just plain unstoppable, winning every race he enters, in a tough class against some really great drivers.
This isn’t an advertisement for any sim racer (though if you sign up for iracing, I wouldn’t mind if you told them I referred you 😉 ), just an observation that these programs have come far enough along now, to be valid training tools for use in the off season.
More fabrication work complete
Despite having to simultaneously deal with a cold and waves of “Camaro groupies” coming by the shop to check things out, John has made a bit more progress on the car.
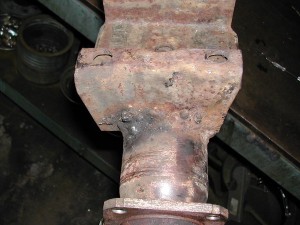
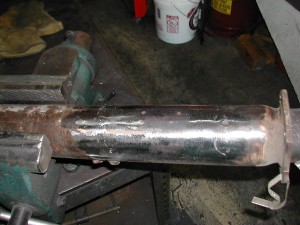
Unitrax completed the rear end with the ring & pinion and diff all installed right. The passenger-side leaf spring mount was bent, rusty, crooked, and had been re-welded or something by a caveman with a blowtorch; it needed some fixin’-
The sawzall, saws all:
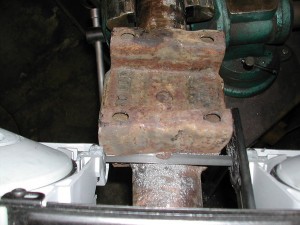
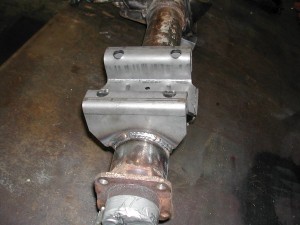
Removed, and readied for the new perch:
This is one place the Camaro’s popularity helps. Replacement spring perch from Summit was just a few bucks, they had it in stock, etc. Probably not many cars where replacement welded-on pieces like this are so easy to come by-
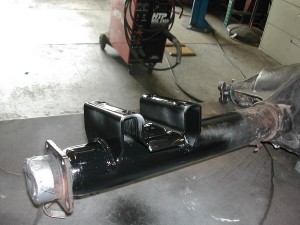
All prettied up and rust protected:
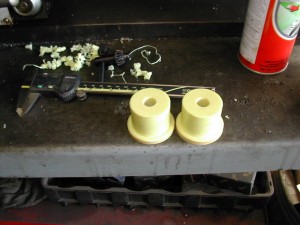
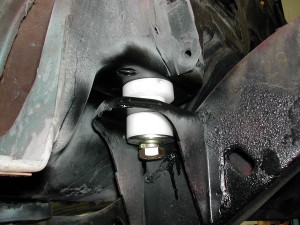
I’d been thinking about buying a lathe and making some of my own bushings, but there are really only a few this car needs, and I don’t have a ton of spare workbench space…so I’m having John make the custom bushings the car needs also. He completed the first couple pairs, for the rear leaf spring shackles-
These Hydlar bushings should offer much improved response over the worn-out stock bushings, which in an informal durometer test, measured just above “marshmallow”
CVD Series underway
I’ve put together the introductory chapter in a series I’ll be writing entitled “Comparative Vehicle Dynamics – A guide to choosing your next competitive autocross or track car“.
These will appear as “Pages” links from this blog – up above you should see a link to “CVD 1 – Intro”. Although the chapters will describe the process I generally follow in analyzing the capability of a given car for a given class, there isn’t really anything in there specific to the Camaro, so I won’t be delivering them as Posts to the blog. Perhaps by the end however, the process will illustrate how the Camaro maybe wasn’t as horrible a choice as most think it is.
Fab work underway – subframe connectors
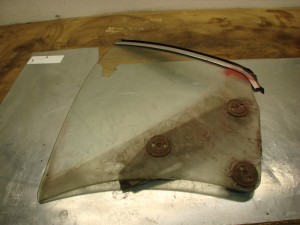
Haven’t done much on this project myself over the past 2 weeks. Cleaned the garage which was getting a bit funky from the disassembly phase, despite continuous cleanup. Sometimes old cars are like leaky faucets of dirt and grime. Feels like you could saturate the world’s supply of Simple Green and shop towels, and still you’d be instantly dirty, knocking dirt all over the floor, the instant you touched it. Hopefully by the end of the body/paint phase the car will be to the sanitary state I seek. One thing I have been doing is cleaning up the side glass, to remove 40+ years of gunk and some recent overspray.
So while I’ve been slacking, John Coffey of Beta Motorsports got started on the car this past week, and was kind enough to snap a few photos along the way.
The rear axle was removed and taken to Unitrax, they’ve checked it for straightness and given it a clean bill of health. They’ll be setting it up with the new ring & pinion I located. There’s a nice variety of final drive ratio choices available for the car: http://camaros.org/drivetrain.shtml#AxleCodes
My initially chosen ratio will provide a bit over 66mph at my initially chosen redline, with a rear tire that does 820 revs/mile. There are options to add more top speed in second (besides raising the limiter to unsafe levels), but I think this will be a good start. At Nationals in 2010 I only hit 68-69mph top speed in the Viper, and with its R-comps, the Viper had a higher speed at the apex and could come off the corner harder than the nose-heavy street-tired Camaro will be able to. At Nats 2009 we hit 72, and I did hit 74 and 72 at the SD Tour and El Toro Pro in 2010, so we’ll see. A taller final drive would make it a bit easier to drive, but I’m worried it might chug a bit (by V8 standards) off a really slow corner. At Nats 2010 there were a couple 30mph corners in the Viper, and I’ve seen National-level events with 25-26mph corners. Sure, there’s always first gear, but after having done a bunch of shifting for 3 years in the Viper, I’m looking forward to a more traditional second-gear-everywhere approach in this car. Not having ABS is going to keep my feeble and already-overloaded mind busy enough when braking into a slow corner.
***Along the above lines – I have an extensive process I use in evaluating cars (like the 240sx, Viper, or this thing) for a class, a part of which I’ve skimmed in the paragraph above, and lightly in other posts. If you’re interested in seeing this process more thoroughly described, email me (jason@rhoadescamaro.com) to let me know. It’s going to be a lot of work to explain everything so I don’t want to start on that road unless I know people are interested. I’d do so in a parallel blog as it’s not really Camaro specific. Analysis would broken down into the following seven chapters, which cover everything your car does in an autocross or track lap:
- Straight-line acceleration (which answers the eternal HP vs. TQ question, how to choose gearing, etc.)
- Skidpad (including an explanation of tires to the depth you need to know)
- Transitions/slaloms
- Straight-line braking
- The launch
- Corner entry
- Corner exit
***
A while back I bought a pair of subframe connectors: ( http://www.rhoadescamaro.com/build/?p=263 ) and John set about modifying them. We’re allowed three mounting points:
H. Longitudinal (fore-aft) subframe connectors (“SFCs”) are permitted
with the following restrictions:
1. They must only connect previously unconnected boxed frame rails on unibody vehicles.
2. Each SFC must attach at no more than three points on the uni-
body (e.g. front, rear, and one point in between such as a seat
mount brace or rocker box brace).
3. SFCs must be bolted in place and not welded.
4. No cutting of OE subframes or floorpan stampings is permitted.
Drilling is permitted for mounting bolts only.
5. No cross-car/lateral/triangulated connections directly between the
driver’s side and passenger’s side SFCs are permitted. Connec-
tions to OE components such as tunnel braces or closure panels
via bolts are allowed and count as the third point of attachment.
No alteration to the OE components is permitted.
6. SFCs may not be used to attach other components (including but
not limited to torque arm front mounts or driveshaft loops) and
may serve no other purpose.
But these only have two attachment points, at the very front and rear. If I’m adding 24 pounds of steelitis, I’m going to get every last bit of value out of these boat anchors! John will be adding an intermediate attachment point to bolt them to the rockers, but he needs to get them in position first. Along with that is the installation of the (stock height) replacement subframe bushings. Would probably use aluminum here if the rules allowed, but since they don’t, delrin it is.
So apart come the subframe bushings, last torqued down about 44 years ago by some fellow in Van Nuys, CA:
John cleans things up a bit before proceeding:
And loosely put together with the new bushing-
Similar process for the rearward body mounts:
And together with new bushing and subframe connector-
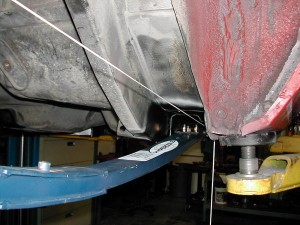
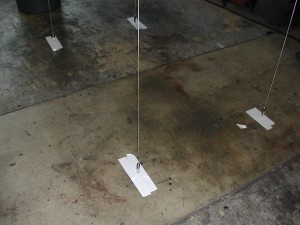
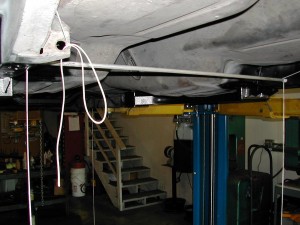
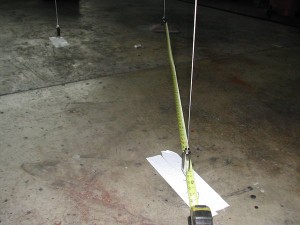
Need to ensure the subframe is square to the body before anything is tightened down, so out come the plumb bobs:
I suspect it’ll come out of John’s shop with a more accurate subframe alignment than it had when it rolled out of the factory 🙂 It’ll have to come apart again later when it’s time for paint, so John will put some things in place to aid in more rapid future alignments.
Driver side connector initial install, no problems:
Passenger side, BMR, we have a problem:
The passenger side connector has a bit of counterclockwise-when-viewed-from-rear “twist” in it, and the rear backets are not square. This part ain’t goin’ on the car! I imagine BMR will ship me another one to make this right, so it’s not the end of the world. I consider myself lucky to even have a decent part available that’s legal for this ruleset – pretty much every other subframe connector involves cutting the floorpan (you can see how a straight path would require this), and welding things to the car. Who knows, maybe they were doing their website’s photo shoot the day my parts were made, which distracted the welder-
A lesson here for everybody fixing up your car, is to not assume any part you get is correctly made or configured, even if brand new, and even when it comes from a highly regarded vendor.
Ahh the 302
For us car people there’s a lot of different ways to find automotive pleasure. For some it’s all about the driving experience on a nice day. For serious competitors, it’s the thrill of a close and tight race. Plenty of folks enjoy “car porn”, a collection of shiny TIG-welded go-fast parts laid before a car like in a preview for the new “Fast and the Furious” movie, and the romance of bolting those parts on the car.
For me, a lot of the fun is the brainstorming and bench-racing that goes on around the question of “How would car X do in class Y?”. In this case, that question, is “How would a ’67 Z28 clone do in STX?”.
There’s a lot you can find out on the Internet, and with that information, you can start to form a halfway decent picture of how the car is going to perform. Here are some things you can find out pretty easily, to help in the evaluation process:
Dimensions – Length, width, wheelbase, height, ground clearance
Engine – Displacement, peak power, peak torque, redline
Gearing – 1st, 2nd, 3rd, final drive ratio(s) available
Wheel/tires – sizes, width, diameter
Weight – total and front/rear distribution
Suspension – type at front and rear, adjustability
These are the things usually comprising the “paper” looked at when people say “Car Z looks good on paper “. However, there’s a lot more to find out, and this information can take some digging to find:
Weight of the car in a trim like yours – both the total weight, and the contribution of your weight-reducing efforts to both front and rear axle weights. For Street Touring for instance, your front seats and mounts should weigh 25 pounds each – how much weight will be saved there? How much in headers, exhaust, lightweight battery? Are there any options you can remove? How low can the car be run on fuel? You have to look at published weights, or weights from people that have weighed their cars, then offset from those figures to account for the modifications you’d make.
How much wheel/tire can the car fit within your rules? How much of it can go inboard from stock?
Dyno pull of the engine with modifications made for your class. This may just be a cat-back exhaust, or that plus a CAI, headers, and a tune, or maybe even more extensive mods. You also have to take into account the different types of dyno (Mustang, Dynojet, Dynapack, direct engine dyno) and build in some correction factors amongst the dyno types and operators. Some massaging to do here, but a dyno is MUCH more valuable to evaluating autocross acceleration, than peak numbers.
In a future post I’ll maybe go into some detail into the thinking used to take all that information and try to apply it to autocross, to see what cars will be faster than others, where on course. But for now, that last bullet – engine dyno – is something I was missing somewhat in the pre-purchase planning stages of the build. I figured an 11:1 compression 5 litre V8 should be able to make more power than a 2.8 litre BMW or normally-aspirated RX8 rotary, but how much more, and where in the powerband? There’s all kinds of legend out there on the 302’s real power output, but not a lot of good hard data. You end up reading through a lot of threads like this:
http://www.camaros.net/forums/showthread.php?t=13864
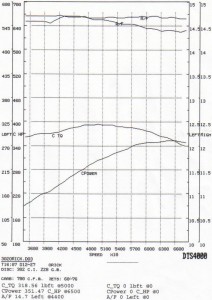
And not really figuring much out. Like stock Z28 quarter mile times, you get numbers all over the place, but most are either wrong or completely unsubstantiated. I did find this dyno:
I happen to know the DTS4000 is an engine dyno, so this was done out of the car, likely without accessories and definitely without any drivetrain loss. That’s about 345hp – certainly more than the factory’s 290hp rating, substantiating many’s claims of the factory having underrated the engine. However we still don’t know the details of the build – whether the motor was fresh or high mileage, if it had headers or stock manifolds, whether it was tuned at all, etc. Assuming the reading is correct the air/fuel ratio seems on the lean side, over 14:1, not quite ideal for power.
So for me, the engine’s power was a really big question mark when it fired up for the first time this past Friday, 11/26.
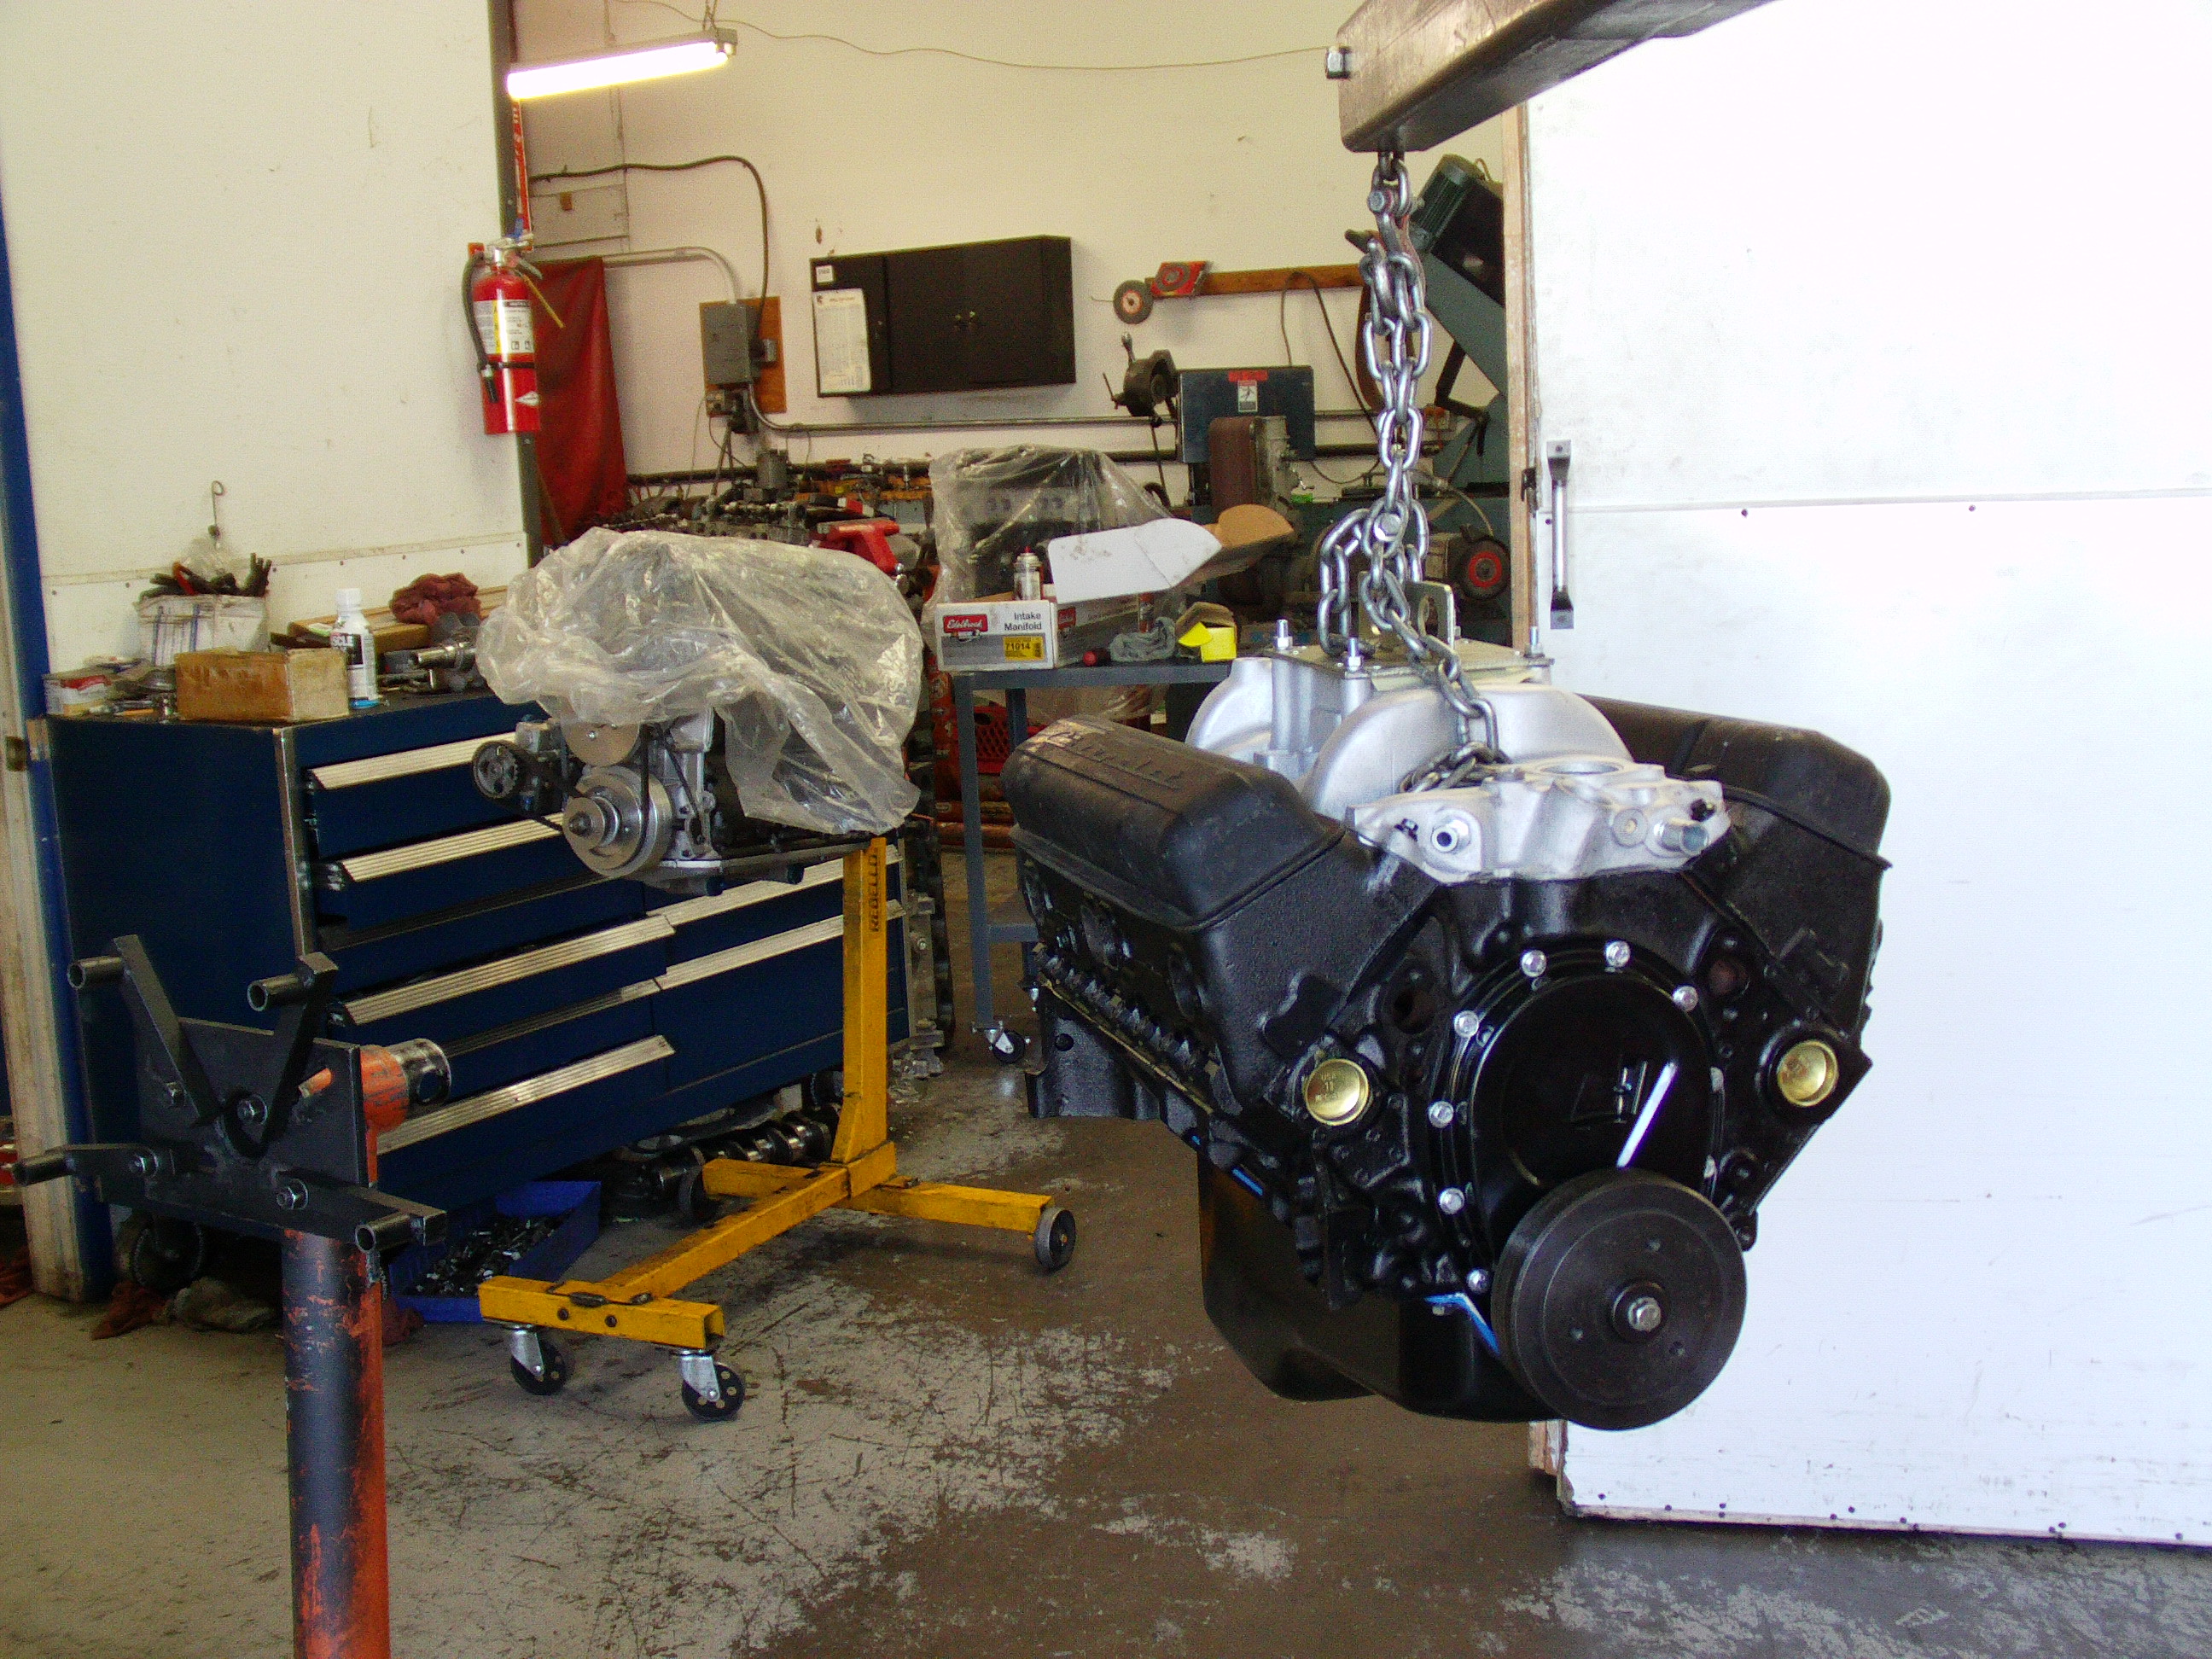
J-Rho’s 302 is born, first startup
The smells coming off this thing were fantastic, it brought me back to the days as a young teen watching the cars go down the 1/4 mile at the now-defunct Carlsbad Raceway. I attribute the smell largely to the fuel used – we didn’t have any of the Sunoco GT100 fuel I plan to run on hand, so we made a mix of 91 octane pump gas and 110 octane leaded fuel. No fancy widgets here to foul up from the lead, just my brain to intoxicate with carcinogens, yummy! 🙂
There’s a lot of myth and legend about this motor out there, perhaps more than about any other small-block Chevy. The components used to make the engine changed from 1967 to ’68, and again in ’69. They made way more ’69 302’s than the other years, but in some ways, the ’67 engine is easier to reproduce. This is because there really isn’t anything special about the 302 motor in ’67, it was all parts-bin stuff – the same 4″ bore, small-journal block used by the 327 and 350; the forged crank from a 283; “fuelie” heads with 2.02/1.60 valves from the Corvette, along with its “30-30” cam. The carb is the same used on the SS396. There really wasn’t anything unique or special in the ’67 Z28 engine, which made piecing together a reproduction, possible. It took a few months, but my chosen engine builder (some may recognize the engine dyno room from these videos) has excellent connections in the vintage and A-Sedan racing circles, having built many smallblock Chevys under varying, but always strict, rulesets.
Here’s a video of a full pull, the only one where we went over 7 grand:
Those awful red boxes are covering the dyno operator’s readout showing instantaneous torque and horsepower figures, it also showed oil and water temps. Hopefully Randy Chase will forgive me, I can’t imagine he ever envisioned his Dashware software being used in this manner, especially in so crude a fashion.
In case you’re wondering, I won’t be publishing the numbers it made. They’ll go to the car’s next owner, whenever that is, but won’t otherwise be released until then. Same goes for some final details of the suspension (spring rates, alignment, shock settings) once I have it sorted. It’s not like I expect a dozen other Z28 clones to get built next week, where I’d be giving up some kind of competitive advantage. Perhaps to some extent, a goal in providing all the information in this blog isn’t to provide all the answers I find on a silver e-platter; rather, it is to help make some of my fellow racers more informed in the critical thinking of competition car building/tuning, and empower them to figure more things out on their own. Perhaps by doing so, some will be inspired to try new things or come up with some new ideas of their own, from which I can learn something in return. By making my competition better, it forces me to get better, which ups the overall ability levels of everyone involved. IMO there’s not enough innovation and outside-the-box thinking in autocross, which I hope to try to improve. And you don’t have to have an oddball car, or spend a ton of $ to innovate – I see innovations pretty much every year in the ST Civics, even though their rules have been essentially stagnant for over five years. It just takes effort.
So I don’t come across as a total tease, I will share this – I went in with a pretty well formed set of expectations of what the motor would do based on all the research I’d done. It didn’t quite meet my expectations at the top end – I’d read enough stories of people revving these motors to 7500rpm or higher, as delivered from the factory, to believe this sort of thing would be possible. After the dyno session, I plan to set the rev limiter at 7000rpm, well below the 7500+ I thought it would be good for. Anybody revving one of these things much past 7k rpm successfully, is either floating the valves something huge, or isn’t doing it with stock/ST-legal valvesprings.
At the same time, I was pleased by what it made in the midrange. We dyno’d with 1 5/8″ primary 4-1 headers, with a Y pipe into a single big 3.5″ muffler. I may retain a similar exhaust config on the car to reduce weight, or go with a dual 2.5″ exhaust. Bigger primaries or a larger OD header-back (note I didn’t say cat-back, ha!) might help top-end power, but the midrange does tend to be more important in autocross.
One advantage of a dual system, is it should be able to package more muffler longitudinally underneath the car. There’s also a 93db sound limitation at my local lot in San Diego, which I’d like to meet. Not sure yet if it’ll be possible to run the exhaust all the way out the rear of the car or not, with the rear suspension still being worked on.
So, it’s good to have the motor built, and home. It will be tuned again next year, after I have it in the car, with the air cleaner and header/exhaust system in place. There really isn’t much tuning to do anyway, just adjusting the distributor advance. Fortunately the air/fuel ratio was okay with the carb freshly rebuilt to stock specs- there’s definitely more power to be had with some tuning there, but I have no allowances to do so. Something I’ll have to keep working on with the rulesmakers – the fuel injected guys can adjust their ECUs to produce whatever sort of fueling they’d like, would be nice if the old-school carb’d cars were given the same freedom.
Phase 2 begin
Couple updates for 11/29. Took the day off work today to get the car up to the aforementioned John Coffey at his shop, Beta Motorsports :

In preparation, thrashed late into the night yesterday putting the back end of the car together enough to get it rolling. Last minute run to the auto parts store for some bearings, and together went the diff.
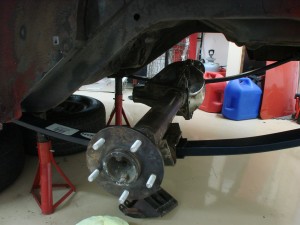
Here it is floating out in space, just like the stock one that came out. But notice here, the Hyperocoil composite leafs, and the once-horrendously filthy 12-bolt, now cleaned up to only moderately filthy, with fresh wheel studs.
Car sits a “little” high on the springs – should come down a little with time as things settle, not to mention the weight of many components like the fuel tank, trunklid, back seats, etc. Still, I worry I’m going to need to have some custom fiberglass leafs made, as the car is about 4-5″ too high here and with 250lb. springs, should only come down a couple inches with the weight.
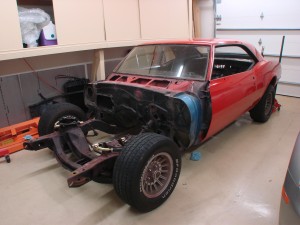
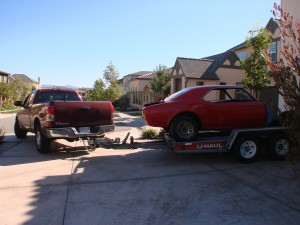
This morning, went and rented a trailer. Loading a car with no engine or brakes on a trailer sure can be fun! Ratchet straps make decent winches in a pinch…
Was yet another beautiful day in southern California. Cold, but clear. Took this in honor of the recently passed Leslie Nielsen:
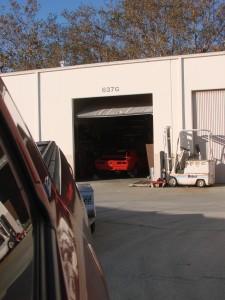
And finally, car made it to Beta Motorsports. I have about a dozen different projects for John, which will take him through most of December. Fine by me, plenty to do on the side while he works. As he completes things, I’ll post pics and explain what was done with each sub-project. John will be fixing a few things wrong with the car, modifying a few of my aftermarket parts to work better, and fabricating a few things from scratch. When he’s done, the chassis and suspension will be “done” from a fab perspective. I still expect to do a lot of suspension tuning, the fruit of this work will be a solid and highly adjustable platform upon which to tune. It’ll also be done from a welding/fab perspective to I can then take the car to get body and paint done.
Phase 1 just about done
If we break this down into five phases,
1. Disassembly/teardown
2. Fabrication
3. Body/paint
4. Assembly
5. Tuning
Phase 1 is pretty much complete. There isn’t much more I can take apart, and still be able to roll the car on a trailer. As it is I need to get the rear end back in the car.
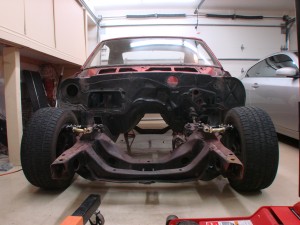 Car looks low here, mostly because the rear is still way up in the air. There’s actually 6 inches of ground clearance in this pic, at final ride height it’ll be about 2″ lower than this. Those upper control arms are from SPC, which I chose for their adjustability.
Next week the car is headed to Beta Motorsports where owner John Coffey will be doing all the difficult fab work and Phase 2 officially begins. I’ve known John for years, since we ran the Open Track Challenge back in 2003. He’s done a lot of really nice work for a number of roadracers and autocrossers in California. If you’re in So Cal and need some fab work done, give John a buzz – just please wait till he’s done with my car first if you don’t mind…:)
Check out the BetaMotorsports Youtube video
I’ve been chatting with John for several weeks on the project, and what started as 2-3 things for him to do, has grown to 10-11 things. It’s not that I’ve thought up a ton of new things, it’s just that as I’ve collected some parts and studied the car more closely, I’ve better realized the extent to which the aftermarket’s offerings aren’t up to snuff. There’s a lot of parts out there that are “close”, that just need a little welding to be made right, a couple other things will be almost scratch-built. Even those SPC upper control arms shown above, I believe we’ll need to modify to increase their adjustment range. Nothing worthwhile is easy!
Rear brakes got here recently – from before, the stock (awful, worn-out) rear drums weighed 43 pounds. Was hoping to save weight with my aftermarket brakes but it looks like I didn’t-
 This pile of brake parts, everything needed for the rears, weighs 48 pounds. There may be a few pounds in packaging there, but at best, my rear brakes will be a wash from a weight perspective.
I worked out what I’m hoping is a good first stab at the piston areas for the rear calipers. They have to be “just right” in proportion not only to the front caliper piston area, but also to the master cylinder bore, taking into account pedal ratio and everything else. Fortunately with a company like Wilwood, I have a few different caliper options with this mounting style and dimension, so I can swap calipers relatively inexpensively if I did this really wrong.
Rotor diameter is 12.19 to start with. I know that’s really disappointing from a bling-bling perspective, but my justification is thus:
1. For autocross, you really don’t need monster brakes, there’s not enough braking to overheat a reasonably sized system
2. Lighter is better, and the larger options will add weight. I’m already several pounds over where I’d hoped to be.
3. This is the largest I can run and still hope to fit 15″ wheels. While I don’t plan to run 15″ wheels while autocrossing, the vintage Trans-Am cars always ran 15’s, so I thought it would be cool to be able to slap on some old Minilite-style wheels or whatever, if I’m ever at an event where I want the car to look even more like the classic Trans Am cars. Plus you never know what new tire sizes might come out some day – if somebody decides to build a radical tire that only comes in an ideal size for the car in 16″ diameter, I wouldn’t want to feel screwed out of that tire, or have to change the brakes to fit them. The more wheel diameter options you have, the more tire options you have, and tires are the most important part of the car.
Speaking of important parts of the car, I hope to be picking something up this weekend that is certainly a very very important part of the car. More to come there, maybe Sunday if it’s ready.
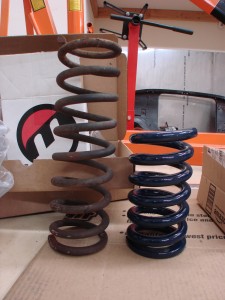
In that pic above, the car is sitting on 9.5″ long 5″OD springs, a size Hypercoil and others label as “conventional” springs in their catalogs. Below is one of those springs, next to a stock spring. The stock spring is almost twice as long!
Q:was wondering if you could use the camber kit allowance to use an aftermarket lower control arm with the shock attachment located closer to the spindle attachment point, effectively improving your motion ratio
Not a bad idea, unfortunately the rules makers thought of this and restricted it. From here:
http://www.rhoadescamaro.com/build/?page_id=260
Under 14.8.I.4:
“Intermediate mounting points (e.g. shock/spring mounts)
may not be moved or relocated on the arm, except as incidental
to the camber adjustment.”
So, if I were to “spend” the camber kit allowance on lower arms, and I lengthened the lower arm by 1″ for instance, I could choose to add that inch inboard of the spring/shock mount.
This would improve the motion ratio from 9/16 (.5625) to 10/17 (.588), less than 5% improvement. There’d be about a 10% increase in wheel rate, which would allow for a softer spring.
Of course, anything that helps is welcomed, but after weighing the possibilities, I’ve decided to stick with the stock lower arms (though they’ll get some special bushings) and go with a replacement upper control arm. I’ll explain the reasoning behind that one later…
Why are old Camaros always so slow?
Them be fightin’ words in some circles but since this is my blog, it’s a fair question to ask. The context of the question today, is around why they’re slow in autocross, when seen from the eyes of a typical die-hard SCCA competitor.
One of the more interesting aspects of this project, has been the speculation and conjecture on why the car is going to be slow in STX. As a car builder, one ought to understand their platform, and in leveraging available allowances, do everything possible to minimize the impact of any deficiencies, while accentuating the strengths. We all *know* these Camaros are slow at dodging cones – but what specifically makes them so slow? Some are convinced it’s the axle-tramping rear suspension; others are sure it’s the front suspension, still others think the car won’t really be making good power vs. its competition because of optimistic 60’s SAE Gross vs. today’s Net HP ratings. Or maybe it’s way too big and heavy, maybe the brakes can’t be made to work, maybe the steering is too slow.
Well, I am sure there are many possible reasons, and until I’ve got it running and tuned as well as I think I can, we won’t know which of the above are true. Maybe none of them apply if the car is built right; maybe all of them are true, regardless of all you do (at least within ST rules).
Though I haven’t gotten too far with it yet, there are two Very Big Things I see holding these cars back in the majority of cases, that I’ll address in this post. Hopefully with my advance knowledge of these shortcomings (queue G.I. Joe) and some efforts made in mitigating them, I can overcome. Here they are below, in no particular order-
BIG THING THAT MAKES EVERY AUTOCROSS CAMARO YOU SEE SLOW #1:
The person tuning and driving that Camaro you see, doesn’t know what they’re doing and/or didn’t build their car to “go fast”. Now, I understand that statement comes across as horribly arrogant, but let me explain-
We all (or most guys, at least) tend to think we know what we’re doing the first we get behind the wheel. “Of course I’m an excellent driver”, and we continue to believe it until we see the times of somebody who really is fast.
To use one of my favorite memes in illustration,
| First I was like- |
 |
| so I was like, |
 |
| but then I was like- |
 |
You just don’t tend to see the really fast guys driving old Camaros at SCCA events, and you almost never see the really fast guys at non-SCCA events. They’re often running more modern and closer to stock Miatas or Corvettes, or whatever the hot car is that year. The best drivers tend to flock to the platforms that are believed to be competitive, because they want to win! It’s super rare to see somebody really good (and please, don’t for a second take that to mean I think I am) driving an oddball platform. What this means is the general Good Driver rule still applies to Camaros- a “really good” autocrosser could hop in the driver’s seat of a “beginner/intermediate” Camaro autocrosser, and usually beat them by a few seconds on 50-60 second course. In some ways the non-competitiveness of Camaros, and many other interesting cars, is a self-fulfulling prophecy, as those who own them are likely to get discouraged by their early results and lack of any evidence they’ll ever be competitive, leading them to to not stick with the sport long enough to get any good at it. Who knows, perhaps with some success maybe I can change that – I sure see more Nissan 240sx’s out there today than I saw before 2006.
So there’s the driving element – if the person driving that Camaro wouldn’t be competitive in the Miata or Corvette or whatever, there shouldn’t be any expectation they’ll be fast in the Camaro. Subtract a few seconds for a really great driver, and maybe the car looks a bit less bad?
The other aspect of this relates to tuning and preparing the car to go fast in autocross, and skill in this area almost exactly parallels driving, though most people seem a little more willing to admit their shortcomings in this space.
There is an unbelievable quantity of parts out there for these cars, as they’ve been undergoing speed tweaks for over 44 years now. While as best I can tell the majority of effort into these cars for decades was around drag racing, the idea of making them go fast around corners has become very hot in recent years and the parts variety reflects this. The “handling” renaissance begat a staggering quantity of suspension parts but not a lot of good guidance on what to do with them. Individuality, limitless modification options with no rules boundaries, and differing levels of willingness to sacrifice street manners on the altar of speed, have prevented the crystallization of a “spec” setup for the Camaro. A good example of a spec setup, is that for the super-popular Street-Touring 1989 Civic Si, published by Chris Shenefield about 8 years ago:
http://www.redshiftmotorsports.com/RedShift%20Tech%20Page.htm
With no spec setup to start from and no prior experience assembling a proper-handling autocross car, it’s no mystery so many of these cars end up not working very well, driving aside. The Camaro as a platform is a deep dark hole to climb out of, too difficult to expect anyone to succeed with as their first autocross tuning project. You can put your faith in what your suspension vendors tell you, but their answers are going to be targeted to the middle of their demographic, who may care more (or less) about a comfortable cruising ride, than you do.
There are some people floating around out there in the old-Camaro world who kinda know what they’re doing around the cones, I think, but since there isn’t really any sort of rules in the old-car specific events, it’s impossible to tell who’s doing a lot with a little (bit of modification), or who’s doing less, with a whole lot more. Structure and rules are frowned upon in those circles, which is a shame because it makes results impossible to use in drawing conclusions.
I guess as a message to all my fellow old Camaro owners out there – if you really want to be fast in your Camaro at the autocross (and largely also, the track) – the best thing you could probably do, is park the Camaro for a while. Get a Miata, or an S2000, or a Corvette, and go run a ton of events (SCCA preferably). Figure out who the fast guys are in your region and track your times against theirs. Even better if you get a similar car. By getting a car that’s great out of the box, you can forget about setup and focus on driving. This will teach you the importance of driving, while at the same time familiarizing you with the characteristics of a proper-handling car. When you’re ready, then go back to the Camaro – I suspect the experience gained in a “good” car will better illustrate how far you have to go with your Camaro. It should also help you better understand the importance of different modifications, and get you to spend the next few bucks on tires or shocks, instead of a supercharger.
How am I going to avoid this common problem? By drawing on my experience as a driver and a tuner from many other cars, to dig this thing out of the deep dark hole it starts out in. I don’t have any success stories to look to, but that’s part of the fun/challenge.
BIG THING THAT MAKES EVERY AUTOCROSS CAMARO YOU SEE SLOW #2:
The stock front suspension really is as bad as you’ve heard. There’s a lot of things wrong; below I’ll attempt to explain just one facet of the wrong-ness 🙂
Most of the old Camaros you see at the autocross look awful – they are too soft, and the front suspension looks like it’s doing the opposite of what it should.

Not trying to pick on this car or driver here – this photo pulled from http://www.milesspeed.com/ – a neat site I stumbled across in researching these cars. Car is owned/driven by cool chick Liz Miles, and this was taken very early on in the car’s development. Using it just to illustrate some of what’s wrong with the car’s front end; odds are if you’ve seen an old Camaro on an autocross course, it looked a lot like this.
Here’s another one from a 1967 magazine article on the original Z28:

That thing has no grip on the crap OE tires, but it still manages to showcase how utterly whacked its front suspension is.
Front grip is tremendously important in autocross. At the track if you’ve got way more power than everyone else, you can maybe get away with a pushy (understeering) car, heck, it’s more stable. But not in autocross. You need to generate big yaw/rotation, and you need to be able to change direction quickly. The front tires do all this work and it’s the front suspension’s job to keep the tires as happy as it can.
Pretty much nobody with one of these old cars is giving them enough front tire. I’ve seen cars with $10k+ in aftermarket grafted-on C6 subframes, uber expensive shocks, and mega-$ forged wheels … wrapped in 245 width tires! With 335s out back! That sort of stagger might work on a 911, with over 60% of its weight on the rear axle, but it’s a recipe for terminal understeer (and a frustrating/boring driving experience) in a 55% front-weight Camaro. If you want one of these things to turn, you need to give it all the front wheel/tire you can, and nothing made today with a DOT stamp is “too much”. My Viper had about the same front weight as most of these Camaros, and it had 335s up front! At that size things were just starting to work right. 🙂 Obviously packaging is a problem but with all the effort put into everything else, I don’t see why more of those guys aren’t running at least 285s up front.
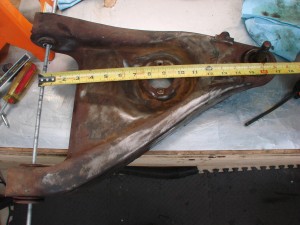
So to the subject of analysis here – the motion ratio – and boy is it TERRIBLE! To many that may not mean anything, so let me attempt to explain. Below is a photo of a stock ’67 Camaro lower control arm. At the far left, the rod illustrates the axis upon which the arm pivots. At a bit past 8.5 inches down the tape measure, are the two bolts that hold the shock. When installed, the spring sits concentrically around the shock. At the far end, just under 16 inches, is the lower ball joint’s pivot point. Though you can’t see it here, there’s a hole for the stock swaybar attachment at about 13.5 inches.
So what’s the motion ratio, and why do I care? Well, the motion ratio, is the ratio between how far the wheel moves, compared to how far the shock absorber (or spring) moves. The further out on the arm the spring/shock attach, the higher (and better) the motion ratio. To calculate the motion ratio, you take the distance from the inner pivot to the spring/shock attachment, and divide it by the distance from inner pivot to lower ball joint pivot. If we round the pictured measurements a bit, we get:
Motion Ratio = 9/16 = .5625
This means, for every inch of wheel movement, we only are going to see .5625″ of spring/shock movement. Okay, so why’s that bad?
It’s bad because we depend on our shocks to damp the motion of both our unsprung (wheel/tire, 1/2 our suspension) and sprung (the rest of the car) weight. The better a job the shock can do, the more consistently loaded our tires will be, the more grip we’ll have, the faster the car will go around the corner, the lower our laptimes. This motion ratio is about 30% lower than the motion ratio of a good modern car.
Below is a pic of a Viper’s front corner – look at how the spring and shock attach waaaaay out on the arm, right next to the lower ball joint: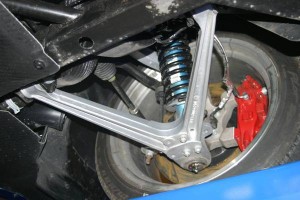
The Viper enjoys a much much better motion ratio than the Camaro.
Shocks depend on velocity to do their job – if they are not moving, they are not displacing fluid, which means they aren’t doing anything. The more shock travel we can get per unit of wheel travel, the better we can control every microscopic bit of that wheel travel. This also allows us to control things with lower shock forces, which makes it easier to find reasonably priced units.
In an autocross car with a good motion ratio, we’re generally looking for what the shock does at about 3 inches/second on a force vs. velocity graph (explained somewhat here: http://farnorthracing.com/autocross_secrets20.html ). Most of the movements the suspension sees on an autocross course are in this speed range, so that’s where we care about what our shocks are doing. Shock velocities above that speed (bumps) are important too but somewhat less so, they’ll be a subject for a later day.
So getting back to the Camaro – with a motion ration of .5625, we’re only getting about 2/3 the shock travel or velocity, of a “good” suspension car. So whereas they get to build their shocks to work at 3 in/sec, ours have to be doing the same quality of control, with 2 in/sec. The problem is, accurate control and large forces at these low shaft speeds, are very hard to come by – any of the common shocks available over-the-counter just aren’t going to get it done, at least not very well. But wait, it gets worse!
Spring rate by itself is a not very good indicator of how stiff a car is – what’s more useful is the “wheel rate”, or maybe the “natural frequency” of a suspension. Here’s an online calculator if you’re interested to find out yours: http://www.racingaspirations.com/?p=292
Those that have ever ridden in an unladen 1-ton pickup truck, and been bounced all around, have experienced a high wheel rate, and a high natural frequency. The high natural frequency is caused by a very high wheel rate, combined with not much weight on the spring (an empty truck bed). If you’ve ever then loaded up that bed with a few thousand pounds and noticed the truck suddenly rode much more comfortably, it’s not because the wheel rate went down (in some leaf systems, it might actually have gone up) – it’s because the natural frequency has gone way way down due to the weight/load in the bed.
We arrive at wheel rate by taking the motion ratio, and multiplying it by itself – “squaring it”, in math terms, then multiplying it by our regular spring rate. In the Camaro’s case, .5625*.5625=.316. That means that for every 1 pound of spring rate, we are going to have .316 pounds of wheel rate.
Wheel rate and natural frequency are concepts you can use to compare the stiffness of any two cars, regardless of suspension type. You’ll often see sliding scales where 1hz is “comfy street car”, 1.5hz, “sporty car”, 2.0hz “race car”, 3.0+hz “race car with aero downforce” – something like that. Those are really just broad generalizations and by no means limits on what you can do with your car.
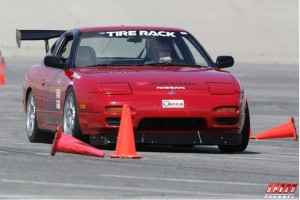 If you’re setting up a car to handle well, 2.0hz isn’t a terrible place to start. If you’ve driven other prepared-suspension cars that you really liked, that were of a similar layout (RWD, FWD, AWD), it might be worthwhile examining that car’s frequencies and consider it as a baseline. For instance, my 240sx used a 550lb. front spring when it was in STS (street tire) trim. It had a bit over 700lbs. of total weight per front corner, about 55lb. unsprung. It used a strut front suspension which granted a motion ratio of about .96. Its 550lb. spring netted a ~500lb wheel rate, and with the car’s weight, its natural frequency was around 2.7hz. While this was way higher than anybody is likely to recommend for a daily driver, it wasn’t terrible on the street, but more importantly, it wasn’t so stiff that the street tire wasn’t working well. The car worked great!
A similar calc on the rear of an STS Civic I built, puts the frequency around 3.5hz! Some guys I know are running springs up in the 4-5hz range on the rear of those cars.
So getting back to the Camaro, now knowing the 240’s numbers (500lb. wheel rate, 2.7hz) as a ballpark. With our Camaro’s motion ratio, to get a 500lb. wheel rate, we’d need (500/.316)=1582lb. springs! Even at that rate, our frequency is only going to be a bit over 2.5hz, in some ways softer than the 240sx. To get to the same frequency I’d need springs up around 1820lb./in!
Ugg, now we’ve got not much shock velocity to control our wheel motion, and on top of it, we’re going to have to run crazy stiff springs to get this thing to the stiffness level we want.
There are a lot of things “less than ideal” about the Camaro’s front end geometry – bump steer, camber curves, etc., that I can’t really fix in ST, and that you can’t really fix with the stock subframe. In an earlier post I mentioned my plan for dealing with these was to set the static numbers good and “not let it move much”. You can see now why people hadn’t really tried that approach before – they couldn’t! No normal shock you could buy off the shelf would damp a 4-digit spring given an equal motion ratio; things that stiff were just outside the bounds of people’s thinking. About the stiffest I’ve seen anyone run is 800lb. springs, for a 250lb. wheel rate, about half what I’ve depicted above. It’s no wonder people were so concerned with bump steer and camber curves – at that low a wheel rate, the suspension would experience large (double to triple) the quantity of travel as the more stiffly sprung version, so the negative effects of bad bumpsteer/camber curves would also be doubled or tripled. It also means they had to run their cars a lot higher, which is a Big Bummer for them, we’ll explore later.
So to bring this home-
Bad motion ratio gives shocks poor control of sprung/unsprung motions, leading to inconsistent tire loading
Bad motion ratio creates a lot of suspension travel at “normal” spring rates, exacerbating the problems with the stock suspension’s camber and bumpsteer curves and necessitating higher front CG
How am I going to avoid letting this screw me up? Simple answer – great shocks! The 28-series Konis I have, were originally designed a few years back for high-downforce Indy cars, where there are very large forces needed at very small suspension displacements. Even though an autocrossing ’67 Camaro is a long ways from a recent Indy car, the characteristics needed end up being quite similar. There are many other high-end brands (Penske, Ohlins, Moton, AST, JRZ, Sachs, and more) than can get this done too, Koni just happens to be the one I’m most familiar with. With a little bit of revalving, they are going to allow me to run these really high spring rates, while maintaining good wheel control, something a lower-end shock wouldn’t.
Lots more wrong with front suspension, more to come on that later…
