The car’s first set of tires
If you’ve followed along in my Comparative Vehicle Dynamics series, and you didn’t already know, you’ll no doubt come to the conclusion, that tires are an extremely important, if not the most important, part of a race car.
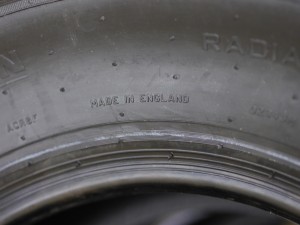
My 2006 run in the STS class was fueled largely in part by the availability of (for the time) next-generation tires for my 17″ wheel, 25″ diameter tire’d 240sx, vs. their 15″ wheel, 23″ diameter Civics. I’d had the chance to experience one of these tires (Yokohama Advan Neova AD07) the year before on an IS300, and knew they held a real edge over the Falken RT-215 still popular on STS Civics. I found I was even faster on the Bridgestone Potenza RE-01R released in 2006, even if I didn’t like the feel of the tire as much, as the Yokohama.
The point of all this, was the 240sx was a fun, but rather expensive experiment, where the hypothesis went something like “A car that has no business doing well, can not only be competitive, but possibly win in Solo, due to a small tire advantage”. I think this hypothesis was proved correct even if it wasn’t the fastest both days – besides, the 240Ssx ran away with the ProSolo win, as it was able to take advantage of its other strengths – namely RWD and torque.
So, tires matter a lot, and if there’s one place you can give yourself a meaningful advantage, it’s there. Chasing every last HP and ounce of weight are also useful pursuits, but in almost any case, I’d give those up to get a tire edge.
But unfortunately, there are only so many tires out there. The leading edge street tires are focused enough in their development, the odds of finding a ringer, that through some weird trick, happens to outperform 2012’s usual suspects (Toyo R1R, Yok AD08, Bridgestone RE-11, Dunlop Star Spec, Hankook RS3, Kumho XS, and now the Michelin PSS) is pretty much nonexistent. Plus the STAC wisely toughened the entry requirements for ST tires, mandating they be available in the same diameter/size counts as Stock-legal tires, which eliminated possible ringers like the Nissan GTR and Ford GT500 OEM tires.
As of this writing I don’t really have a good sense for where I’ll be going with the race tires for this car. Looks like there’s more coming out in the off season, so 2013 stands to be a lot different than the past couple years, in the tire makeup in grid.
It does look like I’ll need to run 18″ wheels though. I for sure want to run the class-max width size (265) and most manufacturers only offer that width in 18″ diameter. While this size defies the vintage look of the car, it does allow for a lot of additional backspacing in the front, making it easier to fit the tires. With 15″ wheels, I appear to only have about 4.25″ of backspace room, before the wheel would hit the steering arm. With 18″ wheels, I’m aiming for more like 5.25″ of backspace.
I do have some 18″ wheels on the way. They’ve been a work in progress the last several weeks, at a small race wheel shop here in California. If I’d gone with CCW I’d probably have received my wheels weeks ago, as Purner is so solid on turn-around times, but even though I’m going 18″ for race wheels, I wanted to go with a style that at least tried to look vintage. Purner’s stuff, even the “classic”, all felt a bit too modern for the car. Hopefully the style I’ve picked for this first set looks good, the wheel maker is so low volume, there are very few of his wheels out in the wild.
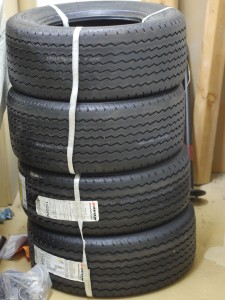
In all this research of tire and wheel makers, and looking at the universe of first-gen Camaros out there, I decided I pretty much hate every large diameter (>16″) wheel that’s been put on these cars. Some look less awful than others, but the styles are all so modern, they just seem to contradict the rest of the car. And it’s not just the wheels, the tire sidewall is a big part of it too. A modern 265/35-18 tire is about 25.5″ tall, with a sidewall height of only 3.6″. A vintage 7.00-15 Goodyear Blue Streak, is 26.7″ in diameter, with a sidewall almost 6″ tall.
If I’m working to make the car competitive in SCCA autocross, I’m going to run the best tire for the car I can, which means running the correct diameter wheels, which means probably not running on the car in autocross, what I think looks best, or suits the car best. Lots of work has gone into making the car look the way I want, and I was careful to allow backwards-compatibility with vintage-sized 15″ wheels. My interest in pursuing a vintage set of wheels and tires was piqued recently, when I came across a thread discussing vintage racing tires for Cobras.
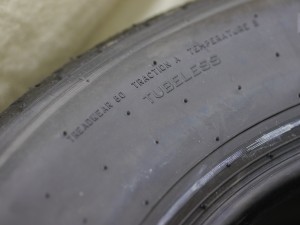
In it, many people spoke highly of a certain model Avon tire – the CR6ZZ. Available in tall sidewall sizes, but built with modern techniques and knowledge. Great on the track once warmed up, great in the wet, and fun on the street, with many people getting over 10,000 street miles in their hot rods. Only downside is cost – one set of 245/60-15 (front) and 275/55-15’s (rear) cost more than the last set of 335/30-18 and 345/30-19 Hoosier A6’s I bought for the Viper.
I figure these will last a lot longer than those A6’s – the Camaro isn’t likely to get many street miles, so these things are likely to die of old age before being worn out. Of course they supposedly they make great track tires, so they may see some use in that capacity as well. Ironically, since they are Treadwear 80 tires, I won’t be able to run them STX, even if I hadn’t gone with the wide 275 rear tire.
The wheels for these tires are a very special set, made by an even smaller wheel company than the one doing my 18″ wheels. This latter company, makes a lot of the wheels used by real vintage racers, the guys running the original Trans-Am and Can-Am cars at events like the Monterey Historics. Even when narrowing my search of wheels to original style and size 15″ Minilites and Torq-Thrust wheels, nothing available new today from the regular makers seemed to look right, except these guys. They just so happened to have four in their inventory, normally I’d have to wait 6-8 months to get a set, but instead I should have them soon.
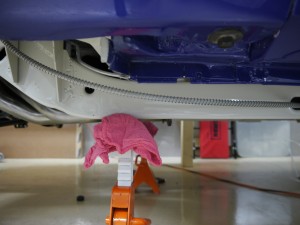
Hope to get the car on the ground soon, on this vintage style wheel/tire setup. I’ve had the car sitting with jackstands under the suspension to try to get things to settle a bit, but the rear is still about 3″ too high, and there’s not much weight left to put in that’ll drop it, save for fuel.
Fluids
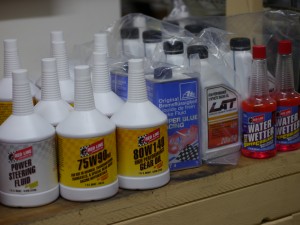
Got a collection of various fluids together for the car. These sorts of things you usually change out one at a time, but since every system is starting out dry, needed them all.
Conventional wisdom has it, you don’t use synthetic fluids in these old cars, and pretty much everything here is synthetic. Hopefully since the seals in everything are new, they won’t have “grown accustomed” to dino juice, and develop leaks, which is one of the main reasons given not to switch.
I won’t need all of the above in the first fill, wanted to get plenty to handle any spillage, and leave some leftover for the first fluid change.
Here’s a description of the Camaro’s new juices, from left to right-
Power Steering Fluid
Went synthetic with the power steering fluid, because there is a real possibility, the system won’t be able to cope with autocross. The later cars (3rd & 4th Gen, even C4 Corvettes) have trouble with boiled PS fluid in autocross settings. I’m not allowed to run a cooler, or make any other mods to help the PS system out directly. The PS lines run very close to the headers (which have been coated with the best stuff out there) but that’s another source of heat. The Redline synthetic stuff is supposed to be able to handle much higher temps than regular fluids, and better resist foaming and other breakdowns.
Manual Transmission Fluid
Here, some people say to never go synthetic. Big reason besides leaks, is how it doesn’t work with the synchros. Transmission synchronizers need some amount of friction to generate their speeds, and if the fluid is too slippery, they won’t work right, and cause crunchy shifts and increased wear. Also, some of the elements present in modern GL-5 fluids, can be harmful to the metals in the synchros, mainly brass. The Redline 75W90NS is formulated to be a good manual transmission fluid – it lacks the friction modifying agent present in traditional limited-slip gear oils, helping synchros work, and it doesn’t contain the elements so harmful to the synchro metals.
Differential Fluid
This isn’t so bad a place to go synthetic. If I was really worried about the limited slip not working well (as I was in the Viper) I’d run a “NS” fluid here, but I suspect the diff will work fine, and the 80W140 fluid has the friction modifying (reducing) elements to hopefully keep it from being a push monster in sweepers. Redline makes some beefier stuff like the Shockproof, but I don’t think I’ll really be hitting the diff that hard with these street tires and a suspension setup almost the opposite of what you’d do in a drag car.
Brake Fluid
ATE Super Blue is a fluid I was very fond of back in my S2000 track days. It held up well to the abuse of the track in a car that was a little bit under-braked from the factory. For whatever reason, the best brake pedal firmness I ever had in that car, was with the Super Blue. I would say brake feel too, but the S2000’s brake feel was never very good. It was also a color (blue) unlike any other, making it easy to tell when it had fully made it in, and later back out, of the braking system. They used to sell a golden color fluid to use in alternating flushes, but the basic parts-store stuff (Valvoline Synpower was one of the best) was usually clear-ish, a good enough contrast.
Engine Oil
LAT probably isn’t a name most people recognize. It’s the acronym for LubeATech Racing Oils – a small but growing company supplying high-end racing oils. This brand was recommended by my engine builder, and since it’d been so long since I talked to him, really had to wrack my brain trying to remember the name he’d given me. With the caveat there’s a lot of legend out there in the engine building crowd, the story I got, was that Mobil1 used to be decent, but that Mobil had started cheeping out on their synthetic base stocks and additives, and that this engine builder’s customers were seeing rapidly increased wear under racing conditions. He’d been moving them to LAT for a while, and had a couple good stories of how the oil had saved a few butts from expensive catastrophes. This oil isn’t cheap, but as you might imagine, neither is building a stock-legal ’67 302, and I want to do everything I can to protect it. These engines simply don’t have the oil control by themselves to live under racing-type conditions.
Water Wetter
Most racers know about Water Wetter – it has some chemical trickery to reduce surface tension and improve the water’s ability to cool the car. I plan to run straight distilled water + Water Wetter in the car, since it won’t ever get anywhere cold enough to freeze, and this will help keep things coolest. Plus if anything bad ever happens and there’s a leak, it isn’t slippery like coolant (which can be worse than oil!), so it help minimize cleanup. I don’t anticipate general cooling problems in autocross, but it’s hard to say now.
###
There’s a couple missing – one is the grease that goes into wheel bearings, U-joints, ball joints, and other places. Have a good synthetic grease in the gun for that. The other is the fluid the car needs the most of – gas! Fortunately there’s a station just a few miles from me that carries street legal 100 octane, which this thing will need. On the dyno it was tuned running a ~100 octane mix of 91 and ~110 low lead fuel. Not sure if you can get leaded gas legal for the street at the pumps any more these days. Since it is carbureted and cat-free, I possibly have some fuel options my competitors don’t.
First driving destination with the car will likely be to that local gas station. Still a ways away from making that trip, but the day is coming closer!
Harmonic balancer, crank pulley, and an ounce of unobtanium
Harmonic Balancer
Motor was dyno tested to 7k RPM with a Fluidampr harmonic balancer. Fluidampr has a pretty good reputation, but the unit used on my motor was mostly just what they had lying around in the shop, vs. an ideal. From the looks of it, it had done a few rotations. Including, perhaps, a few on the shop floor-
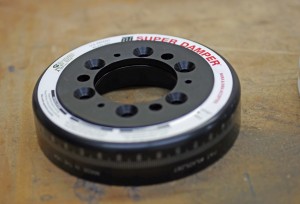
After a typically lengthy amount of research, ended up with a solution, an ATI Super Damper.
Now, it’s not like there’s one ATI Super Damper for a small-block Chevy. A search on Summit for a ’67 Camaro returns 34 unique part numbers. Why so many?
There are several choices you have for fitment. Starting with the hub, the piece that slides onto the end of the crank – you can go with steel or aluminum.
Steel is a bit heavier, but a lot easier to make work. Because the damper relies on a tight fit to the crank, and the different coefficients of thermal expansion, the aluminum hubs essentially have to be custom-bored to fit most cranks. They also require more frequent inspection and replacement, and I’d come across at least a couple online stories of catastrophic failure. Ugg. Not something I’d be looking forward to. And while it would be lighter than the steel, most of that weight is at a very small radius from the crank centerline, so the impact on MOI (moment of inertia, the object’s resistance to being spun), would be the smallest of these parts.
Part 1 – Hub: Steel or aluminum (steel)
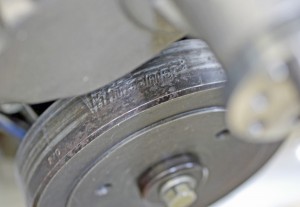
Next is the piece pictured above, the damper element itself. Internally these are comprised of two or three damper rings, separated by a tuned and serviceable elastomer. The three ring dampers are more costly and a bit more heavy, but offer superior damping characteristics. I chose three because the weight difference was negligible, and this was hedging somewhat the next choice made…
Part 2 – Rings: 2 or 3 (3)
The dampers are offered in varying diameters, essentially 5″, 6″ or 7″. The stock Z28 damper, which was a popular unit on all racing Chevy motors for a long time, is actually a big heavy 8″ piece. Again, as with ring choice, the greater the radius of the damping elements, the more they can do to handle those crank harmonics. I made a compromise choice with 6″. If the car was only ever autocrossed I might do 5″, but I do plan to do the occasional track day too, where it will spend a bit more time at high RPM. The 7″ unit would have been OK too but they don’t seem to be stocked anywhere, and I wouldn’t want to wait to have one made.
Part 3 – Diameter: 5″, 6″, 7″ (6″)
Lastly, the metal used out between the elastomers, can be steel or aluminum. The steel options are significantly heavier than aluminum (8lbs. vs. 3lbs. typical), and reportedly don’t offer much in the way of improved damping characteristics – mostly just less cost. Went with aluminum here.
Part 4 – Damper material: Steel or aluminum (aluminum)
The above 2x2x3x2 only equates to 24 options – there are others for supercharged motors, weird offset items, things like that. A truly staggering array!
Now, some may recall a book by David Vizard, where he mentions testing a bunch of different dampers, and the heaviest one made the most HP. So why didn’t I get the heaviest one? My thinking here is the ATI should do a very good job for its weight, and this unit is at least 5 pounds lighter than the heavier option – so even if the car is down a HP or two, that’s 5 fewer pounds the front tires will have to try to drag around every autocross corner. Everything is a compromise…
###
Crank Pulley
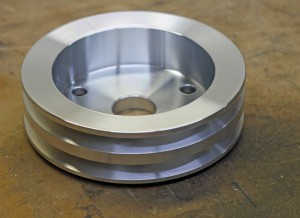
In a previous post I showed the weight savings from a billet aluminum alternator pulley, over a stock cad-plated piece – it was significant. I’m hoping the weight savings from a similar billet aluminum crank pulley are similar. This crank pulley is from the same “performance ratio” (somewhat underdrive) March kit. They are very nice looking pieces, with a shiny anodize that’s easy to clean-
Not sure exactly how underdriven this pulley set is. A plus side of the underdriving, in addition to “freeing up” some HP, is it tends to help keep the water and power steering pumps from cavitating at high RPM. Even though the 302 motors could spin fast, the ancillaries weren’t always built to handle it well.
Since the fan is driven off the water pump pulley, the fan will turn more slowly, which frees up HP (mechanical fan can sap 40HP at high rpm!) but has the downside, of maybe not turning the fan as quickly at idle. That could mean higher temps – not usually a big deal in autocross – but it could also mean problems for the battery, if the charging system isn’t able to keep up. Actually have my pimpy battery for the car, that’ll be another post, once I decide where it’s going…
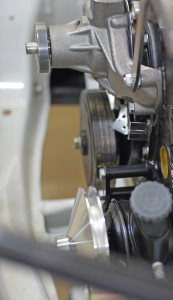
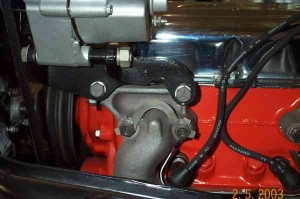
Above is a shot at the March power steering pulley in place. Apparently the stock PS pulley is a big heavy cast iron piece, yikes! This pulley should do a lot to mitigate the 20+ lbs. a power steering system adds to the car. The pump itself isn’t that heavy, nor are the lines or brackets. I bet half the weight is in the heavier steering box, and at least that piece is behind the front wheels. Can you tell yet I’m obsessed with weight distribution? 🙂
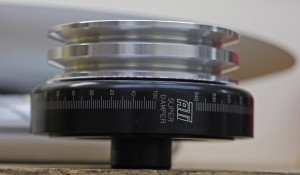
Here’s the crank pulley mated to the new damper and hub, as it will be in the car:
###
Unobtainium
So what holds those things together? A few fasteners. One is the main crank pulley bolt, threaded into the crank itself, operating at a very small radius.
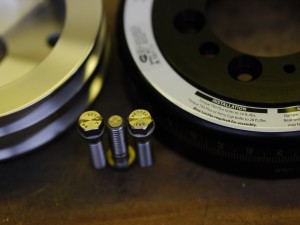
Additionally, there are three threaded fasteners, 3/8″-16 x 1.25″. Pretty small and light units, but they’re connected right to the crank, operating at a couple inch radius, contributing a good bit to the engine’s MOI. Given that we’re free to replace the crank pulley, means we’re also free to choose what fasteners to use in holding in the replacement.
We’ve all heard stories of people with big $ going through their cars, chopping down every heavy steel bolt to minimum length, and replacing every other bolt/nut they can with something much lighter, to great effect. I was curious how much benefit there would be on these units, as being small, they wouldn’t be too expensive, and since they rotate at crankshaft speed out ahead of the front wheels, would be just about the best weight to replace…
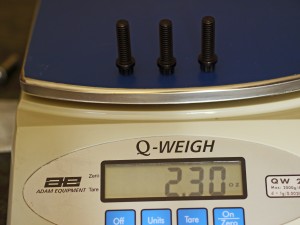
The three steel bolts shipped with the ATI damper don’t feel heavy for their size, and weigh in at 2.3oz for the trio-
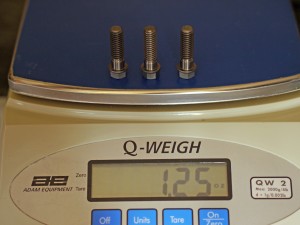
Now on to the unobtainium (using that word in the Lockheed Martin SR-71 Skunkworks sense) bolts. Equivalent in size to the ATI supplied bolts, they are…
…1.05oz lighter! Over 45% reduction in weight, not too bad. If one were to go through the whole car and replace every fastener with one of this material, in a just-long-enough length, bet you could save over 50% of existing fastener weight. On a car like this that’d be not insignificant – possibly 20 pounds.
Still, I won’t be running out to replace a whole bunch more fasteners, though with all the allowances in the class, there are quite a few which could be. Just wanted a little unobtainium in the car to give it a bit more of that cachet, and to see for myself what sort of real savings it could bring.
When you guys see how heavy my exhaust system is, those three little bolts will seem really silly. 🙂
Headers back, couple minor things
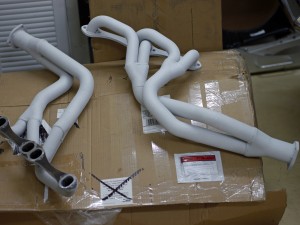
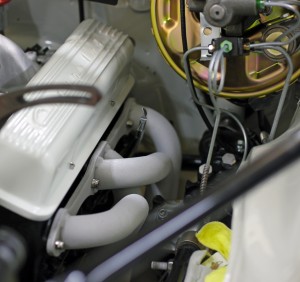
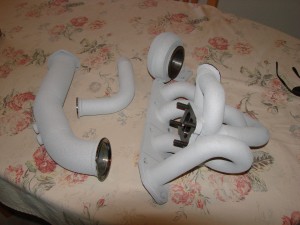
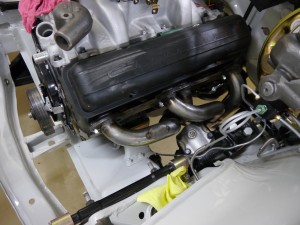
Headers made it back from Swaintech with their White Lightning coating.
Again a very high quality result, and now that I see how close the headers run to critical components like the starter and power steering, am even more glad I went with it.
The coating itself should last a long long time, and help the neighboring components last longer too.
Thought I’d let the pimpy valve covers make their entry now. They’re the same off-white used everywhere else on the car, though they do look a little different here in the light.
Still have a few little things to take care of on the underside of the car before the exhaust can go in, not the least of which is the remaining bends to make on the shifter linkage so it doesn’t bind itself up when in reverse.
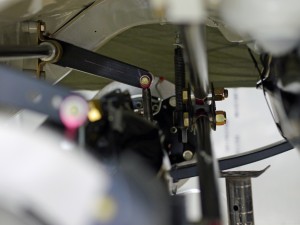
Out back, made a couple modifications to the rear swaybar, even though it hasn’t been used yet. One, was shortening the endlinks on both sides by about an inch. The second, was shortening the driver-side arm, so it’s the same length as the non-adjustable passenger side. These two changes should provide a lot more bump travel – with this arm length, the bar arm ends will contact the floor (if nothing else hits first) at its highest point, allowing for maximum travel. You can see it somewhat here:
A couple weeks ago I put together a to-do list of things I could think of off the top of my head. Presently it has 57 items, of which 7 have been done. 4 will require outside help – mount tires to wheels (which themselves haven’t even been made yet), add a slight bend to front swaybar arms (purchased a narrower front center section for the swaybar to allow for more tire clearance, but it requires modification to the arm shape), welding the alternator bracket to the header (found a bracket but should have it welded for better stability/reliability), and the headliner install. I could *try* the headliner install myself but everything I’ve seen says you need at least 2 people, if not 3. It’s not like newer stuff where it snaps in, it’s a real fabric thing with adhesive and these wacky metal rods. Looks like awful work.
Each of the tasks on the list are 4-8 hours, so still a long way to go. Will try to take more pictures along the way. Here’s an artsy one in the meantime…
Alternator mounting wackiness
A couple things conspire to make mounting the alternator in this car tricky.
First, is the lack of allowance to change the mounting at all. There are simple bracket kits out there to relocate it to the passenger side, which would help weight distribution, but of course this would not be allowed under our rules.
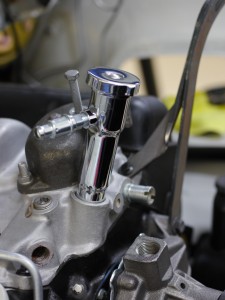
Another problem is the method used in the early Z28, was somewhat unique to those years. The cylinder heads weren’t yet provided with the mounting bosses, so big wacky brackets off other parts of the engine, is the way. Here you can see how the upper portion is a 2-part bracket pair, with one part hanging off an intake manifold bolt, the other shared with a water pump bolt. This photo was meant to show off the oil fill tower, but of the ones I took it best shows how the brackets attach:
The parts are available to reproduce that part of the alternator mounting, but one more challenge awaits. The picture here I borrowed from the site 67z28.com and the excellent photo restoration done there. It illustrates how the alternator attaches to the engine at the bottom. A cradle bracket, which affixes via two bolts, to a threaded part of the exhaust manifold! Arrgh.
I have the black bracket pictured, but obviously my aftermarket headers are not going to have the provision to attach that bracket. I’ll need to get the precise factory measurements, and modify my Swain-coated headers (due to arrive back tomorrow) with an additional welded-on piece, to allow me to hold the alternator bracket in this exact same way.
Funny thing is, I’ve seen some pictures of the headers originally offered with the early Z28s, and they had that part on there, a simple rectangular bit welded to the flange.
Pulley weight savings
I don’t have a set of original 302 Camaro pulleys to compare to, but I suspect I’ll be able to save a bit of weight with an aftermarket set. Purchased the kit from March Performance. It is reasonably priced, made of billet aluminum instead of chrome, and has deep grooves for the v-belts. These cars have a reputation for “throwing” belts at high rpm, and the deeper pulley grooves help this.
March also has a ton of wacky serpentine conversion kits to move it all to a modern single-belt system, but alas, this would not be legal.
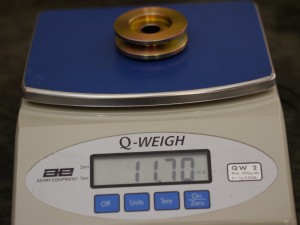
Only have the alternator pulley for comparison. I guess technically this is a generator since it has an external voltage regulator, but anyway, the stock one-
Felt heavier than it looked. Probably some kind of plated steel.
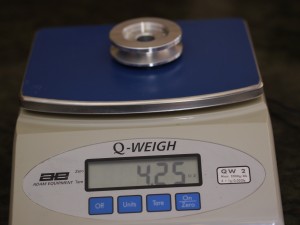
March billet aluminum equivalent:
7.45 ounce difference – almost half a pound! Pretty significant for a pulley only about 2.5″ in diameter. Besides being up high and forward of the front wheels, this thing also turns much faster than engine speed, due to the diameter difference from the crank pulley. So three wins on the weight side for this pulley. Will be using the March pulleys for the remaining pieces – crank pulley (2-belt), water pump pulley, and power steering pulley. Since the other pulleys are all larger than this, I suspect this will add up to several pounds of rotating weight off the nose, a great help!
Driveshaft in
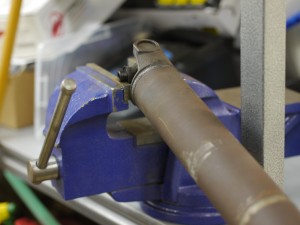
The driveshaft was one of the few things I haven’t had to buy, the unit in the car was correct, stock, and appeared in decent, if dirty, condition.
Still, wasn’t going to put a rusty, covered in red overspray, worn out driveshaft under the clean car, even if it is bound to get thrashed.
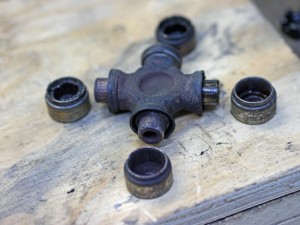
Banged out the original u-joints. They didn’t look too bad actually. Since the car had an open 3.07 rear, maybe it hadn’t lived too hard a life?
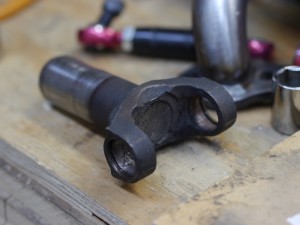
Transmission yoke – funky but usable
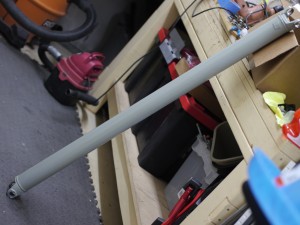
Cleaned it all up with a bit of steel wool and degreaser. Hit it with some primer and some light machine gray rattle can, resulting in a decent looking part-
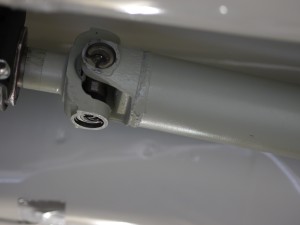
And installed in the car – these pictures aren’t very good, but you get the idea-
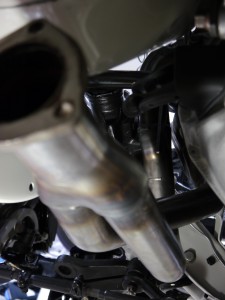
This part wasn’t too hard, and is a prerequisite to hanging the exhaust system, which is here now.
Intake Irony
Received an email last week from Vorshlag race shop owner Terry Fair, about a possible problem with the Camaro. I do love getting these sorts of mails, seriously! One has already helped me spot a problem that may need fixing (offset axis of my front lower control arm bushings). This one began with-
A friend of ours who is a 1967-1969 Z28 expert (Ed, cc’d here). We showed him your build thread, which he loved, but he noted one glaring missing item underhood within 15 seconds…
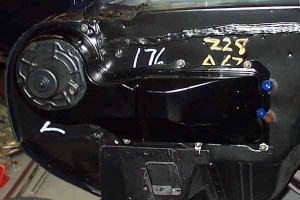
It then pointed to this photo:
and continued-
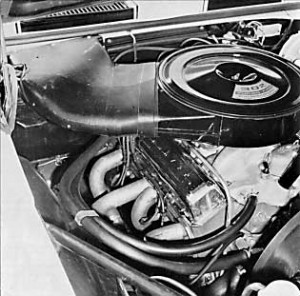
He saw this picture and said “Its missing the hole in the firewall for the cowl feed air cleaner inlet”. Apparently this is only on the 1967 Z28s. I had never heard of this but we did a google search on “1967 Z28 cowl” images, and sure enough…
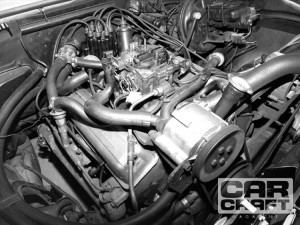
Then followed some photos, which I’ll include here:
The second one is from a Car Craft article – Car Craft photo source – check it out there to help with their ad revenue!
He said these were cut at the factory with an air chisel, but that is accurate. You can see the edge of the hole in the first link above with the dual-quad air cleaner removed. Of course you don’t need to run this exact air cleaner (and you can’t find one for any amount of money), but that hole probably needs to be there. Somebody will notice that missing.
You might already know about this, just wanted to pass that along. Keep up the good work – love this blog!!! 🙂
###
The cowl air cleaner is an entertaining bit of original Z28 lore. Ed contends the firewall holes for the air cleaner were cut (coursely, it would seem) at the factory on all ’67 Z28s. Terry extends this to say, that I need to have the hole, since it would have been part of every ’67 Z28 chassis, even if I don’t intend to use it.
The irony here, is I would love to cut that hole and run my intake like that, but I can’t, because it wouldn’t be legal! 🙂
The truth is, that intake option was available from the factory, but it was delivered as one of the earliest examples of what the SCCA calls (rather appropriately in this case) a “trunk kit”. Trunk kits are defined in the SCCA rulebook as “post-factory performance kits”. Frankly the lines on what is and isn’t a trunk kit is a bit confusing to me, as some recent cars (Mazda MX-5 MSR and Pontiac Solstice Z0K) have been deemed legal with some trunk-kit type suspension stuff.
Not a huge deal here, as I can probably find another way to accomplish a good cold air intake. Still, for as unsophisticated as many parts of this car were, the orignal 1967 cold air intake design is actually very good – pulling cold air from a high pressure area at the base of the windshield, without a lot of complex routing. Also alleviates the need for a big ugly scoop on the hood – not a fan of those for their looks from the outside, and for what they do to visibility from the inside.
You could get this intake kit as a service part from your dealer, or as part of RPO package “Z28-2” ($75 more than the regular Z28 option) or in RPO package “Z28-4” (which also included headers, also in the trunk, for $475 more than the base Z28 option). Some of this information is available here in a compiled list of first-generation Camaro options: First generation Camaro options (itself borrowed from the great group at the “Camaro Research Group” http://camaros.org/options.shtml#RPOSpreadsheet )
Jerry MacNeish, published author on first-gen Z28 information, goes into further detail in his book “The Definitive 1967-1968 Camaro Z/28 Fact Book” (available here: http://www.z28camaro.com/publications.html )
For the Z/28, the cowl plenum air cleaner was available as a regular production option or as a service part. With an RPO Z282 package, a Z/28 would come with the cowl plenum air cleaner shipped in the trunk. An RPO Z284 package would provide a Z/28 with the air cleaner and set of exhaust headers.
…
If factory ordered, the air cleaner was shipped in the trunk with installation instructions that showed where to cut the firewall hole. The method for cutting the hole was left up to the installer.
Jerry even includes a full-page image of “Instruction Sheet Identification No. C916621”, which details the placement and what size holes to drill for the attachment screws. You can be certain Jerry’s book will be riding right alongside my collection of factory manuals, to assist in the event of the car being protested. 🙂
Not wanting to trust only a single source of information – and frankly, also out of hope I could find an opposing bit of data to justify running this intake myself, I’ve researched this a ton on my own. Unfortunately everything I’ve found supports Jerry’s stance, it was a factory option but had to be dealer or user installed. I’ve also found good evidence of original ’67 Z28s without the hole present, further contradicting Ed’s belief, that the holes were factory cut. One such place is this excellent Z28 Restoration Chronicle – featuring this Z28 Restoration Chronicle – firewall pic
I’ve gone back to that site countless times to review things like brake line routing, shifter hole placement, etc. It’s extremely good, even though the pictures are a bit lower resolution that I would like, or than we’ve grown accustomed to in 2010+. In the picture above you can see this original ’67 Z28 Camaro firewall, without the cowl plenum air cleaner hole cut.
So, I can’t run it, but would really like to. The original Trans-Am guys ran it single-carb in ’67 and into ’68, and later ran a revised version that fit the dual-carb induction setup Chevrolet homologated.
An interesting observation in researching alternative cold air intake (CAI) solutions for the car, is how little attention people seem to have paid to this aspect of performance in these cars. My impression was if you asked a hot rodder what “C A I” stood for, providing the hint it had something to do with the intake, they’d probably guess “Chrome Air Intake”. You can find 10,000 different chrome air cleaner lids for these cars, but practically nothing built for performance, short of some tall intake stuff designed to work with monster hood scoops.
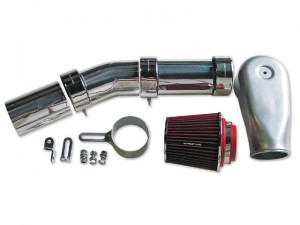
One thing I have found is this, made by Spectre Performance:
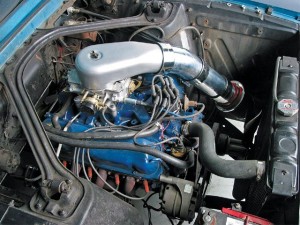
Installed in a classic Mustang, from an article at MustangsAndFords.com:
This sort of intake looks a little bit funny on a carbureted car, but should work. They have a kit now for the first-gen Camaro with a little blockoff plate, where the filter goes in the front passenger corner, the original home for the battery. Carburetors are a bit like MAF (Mass Air Flow) sensors, in that they expect the air they ingest to come from certain paths and angles. Not sure how this sort of kit would affect things.
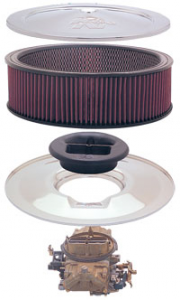
Another option is from K&N, they make a device they call the “Stub Stack”, a small velocity-horn-esque component which sits above the carburetor:
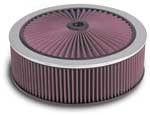
That sort of device should be legal in ST, since it operates before the carburetor inlet. They also have these XStream air cleaner lids, where the top becomes an additional filter element:
But haven’t really been able to find any good third-party test results for any of these things. The old world of small-block-Chevy engine tuning seems lacking in some of the basic A-B scientific part tests we expect to see on modern platforms. They could be junk.
So, as of today, still not sure what I’ll do for induction. Even with the Swain coating on the headers, it’ll be hot underhood, and I’d like the engine to retain consistent performance when being run hard. The factory trunk kit piece would be perfect from a performance, simplicity, and classic authenticity point of view, but unfortunately I don’t think it can be considered legal, despite many many hours of research, looking for an angle where it arguably could be.
Many thanks to Terry, Ed, and the Vorshlag crew for their thoughtful message. I’m sure they can appreciate the amusing irony, or being called out for not running a part, you wish you could!
STX thrust comparison 2012-2013?
A recent thread on the new Toyota Scion FRS & Subaru BRZ on roadrace-autox.com took an interesting turn around post #3680, when someone opined on where the car should go in the Street Touring category.
Now that Street Touring has moved from seats-and-displacement based classing, to one relying on subjective assessment of vehicle performance, there are many places where a given car could land. As a normally aspirated and lightweight 2+2, the FRS/BRZ could fit in many of the classes, and every single one – STC, STS, STX, STR, and STU, have been mentioned.
A good bit of the discussion was on how the car would fit in STX, given how similar it is to the RX8. Some dynos were shared and thoughts on acceleration given.
Since I’d already collected the data for some other STX cars, it was not too much work to provide an STX-centric thrust spreadsheet, which I’ve linked to below here.
There’s still a lot unknown about the FRS/BRZ, including what size tires it can fit. Feel free to download this spreadsheet and make adjustments as you see fit.
Based on what I’ve seen so far, the accelerative capability (which by no means dictates in-class performance!) looks to be on par with the RWD class leaders in STX. The BMW 328 appears to have a slight edge over 55mph, and the Scionaru would appear to have an edge at very low speeds (~25) which could possibly be an edge up to 35mph if there were a way to tune out the torque dip. These all pale in comparison to the nearly-forgotten WRX, which dominated the class for so long but has been out of favor in recent years.
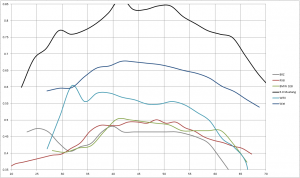
The sample data I’ve provided here for the Camaro includes a very optimistic curb weight, and dyno numbers from a magazine engine build, that are possibly somewhat representative, but certainly not identical, to a stock-legal engine build for the same motor.
Header test fit
Small-block Chevys with headers is the automotive equivalent of a peanut-butter sandwich with jelly – once you have the first thing, you have to try having it with the second. I’d bet anyone, that more headers have been designed, built, and sold for the ubiquitous SBC, than any other engine in history, and likely, for any engine that ever will be made. So choosing headers for the car should be a slam dunk right? 😉
Given the popularity and huge run of the SBC, there are a staggering number of choices out there. And amongst those choices, pretty much all are available to fit in a Camaro – which, for the most part, has plenty of room for headers of any design.
The most common design is a 4-1 long-tube style, usually with primaries about 30″ in length. Among the best of this breed are Stahl headers – these:

are built off the same jig used to make the headers used on the Penske/Donohue road race cars from ’68 and ’69. Great ground clearance, with a race-proven design. Fits the theme too…so a good choice?
Since the primary use of cars like Camaros from 1970 until recently has been drag racing, most of the brand names you think of (Hooker, Hedman, etc.) designed their headers with drag racers in mind. Drag racers don’t tend to run their cars as low as road racers, so they’re less concerned about ground clearance, and low weight. Most headers you find for this crowd are a heavy-ish gauge steel, with a crummy high-temp coating, and hang down 2″ or more below the frame of the car.
One trait drag racers and road racers have in common, is a focus on the top end of the powerband. As a vast generalization, the common 4-1 design SBC header promotes maximum peak horsepower, and the primary tube diameter (1 3/4″) and collector size (3″) most often offered, is really bigger than needed for a typical SBC in most uses. In my case with a 302 (at the small end of SBC displacement) and a focus on midrange (this is an autocross car after all!) – the vast majority of the headers out there just weren’t the right fit for the application, at least not as I see it today – including Stahl’s headers above.
My priorities:
- Good ground clearance, not hanging below the frame if possible. The car will be on and off trailers often. Super low cars with long wheelsbase (108″ remember!) are a nightmare to load and unload from trailers. Plus sometimes we have bumps or dips while racing.
- Good low-end and midrange. While even in the worst case I should have more acceleration at low engine speeds than the competition (especially now that unfortunately, Terry Fair has wussed out and gone to ESP with his crazy-powerful 5.0 Mustang), the 3000-4500rpm engine speed range (equating roughly to 30-45mph with initial gearing choices) are what matters, and a lot of people will say the 302 doesn’t even “wake up” until 4500. I’m hoping “those people” are those used to big blocks, who would say that something like an RX8 never wakes up… 🙂
- Low weight. This weight is up on the nose, and not all that low. Thin-wall stainless like 18ga would be lightest, but also the most fragile in a header-impacting event.
Based on this, I took a plunge on an off-the shelf header that *should* meet these requirements. As with the shifter in the previous post, things aren’t quite right out of the box – the passenger side header needs to be bent downward a bit at the rear, to keep from hitting the floorboard. Might just cut off the triangle flange and go with a v-band, haven’t decided yet. Driver side fits perfectly.
Instead of a 4-1, it’s a “tri-y” design, also known as 4-2-1. It’s not stainless, but is a thin-wall mild steel, the units are quite light. Primaries are 1 5/8″, and collectors are 2.5″. Those are good conservative starting values, similar to what was used on the engine dyno, though the dyno headers were 4-1. The purpose of the test fitting was to make sure they’d fit the car and its components, before being sent off to Swaintech for their White Lightning coating to be coated inside and out. This stuff is extremely effective at keeping the heat in, I had used it years ago for the turbo components when I took my 240sx to Street Modified:
This should really help keep the interior heat levels under control. A lot of the restomod/Pro-Touring guys add a hundred pounds of sound and thermal insulation to their cars…definitely not a fan of that approach for a car with heavily sporting intent. Will probably be doing Swain on the rest of the exhaust system (which itself is still somewhat TBD) to help keep the floor cooler.
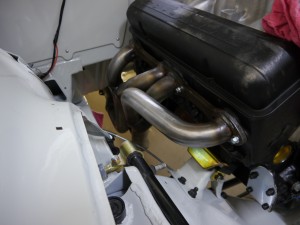
From inside the engine compartment, passenger side-
Not much going on over there, especially with no heater. The Swain will help keep the starter from getting cooked, and not working on a hot engine on a hot day.
Driver’s side is a lot more cramped, but they fit well, with at least ~3/8″ clearance to the other hard parts. Again, counting on the Swain coating to help keep the PS fluid from boiling, or other things from melting.
Ground clearance – not perfect, but close to it, for this car. The larger diameter things have a harder time staying tucked up like this.
If I end up with the nice-to-have problem of too much low-end and midrange torque, such that throttle modulation is impossible and the 265 street tires are constantly being blown away… then I might consider going to a more top-end-centric header design, as an archaic sort of traction control. Or, if the power feels lacking somewhere, having someone like Burns Stainless design and build a custom super-thin stainless set of headers based on all the engine parameters, with a focus on beefing up the spot of the powerband that feels lacking.
I’m hoping the SBC have been around long enough, the unit I have is an effective design, taking into consideration its apparent goal of being a good “street” header. I had Burns do a full workup years ago for my 240sx when it was in STS (stock engine, normally aspirated) and the tubing diameters and lengths their software spit out, were pretty much exactly what DC Sports had put together in their cheap off-the-shelf unit.
Now that I’m confident these things are going to fit, placed an order for the rest of what needs to go under the hood. Hope to get the flow of updates coming more regularly soon.
Stay tuned!
