Engine finally in
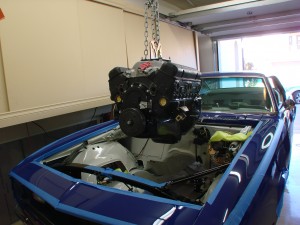
Any movie that involves building a fast or special car usually has some kind of montage where the characters are rolling around on creepers, wiping grease and sweat from their brows, and at least at some point – lowering the hot new engine into the car. It’s an exciting moment, one where the car goes from being just a shell or chassis, to the beginnings of an automobile. The body receives its heart.
Especially so in this case. The engine isn’t just any small-block Chevy, but an accurate reproduction of the original 302 cubic inch engine found in the original ’67 Z28.
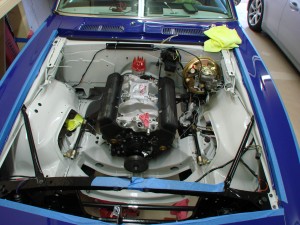
It sits nicely in the engine bay, further back than you might think. These cars have a reputation for the big heavy motor hanging out past the nose of the car, but as you can see it’s not really the case:
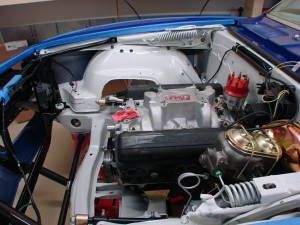
Front axle centerline is somewhere in the vicinity of piston #1. Could be better, but clearly not as bad off as something awful, like a Subaru. With no fan, shroud, and radiator in place, there’s room to stand inside the engine bay in front of the motor.
Still looks pretty open in there, but there’s lots still to be added. Cooling system, fuel system, headers, power steering, alternator, etc. You can see here the brake hard lines have all been run, that was the last thing I wanted to get done before dropping the engine in. Transmission *would* be in, but I’m missing one critical part (clutch fork pivot ball) needed for assembly.
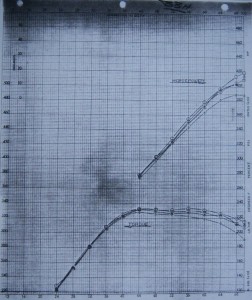
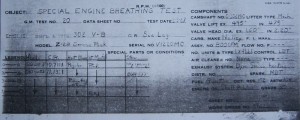
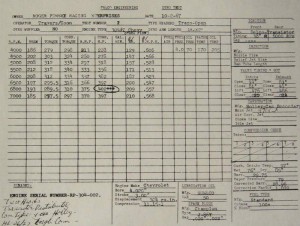
Coincidentally I came across some neat dyno charts today of the 302, from back in the day. Credit for these goes to Jon Mello from the Camaros.org website, where I’ve done a lot of my research. These first couple pictures show the gains produced from some (not ST legal) modifications to the engine.
Interestingly, the engine gains very little in the midrange from the modifications – benefits come mostly above 5500rpm, where the engine would see little time in autocross (though plenty at the track). The baseline dyno in this series isn’t terribly far from an ST legal engine – it uses the stock 4bbl carb (jetting unknown), dyno “service” headers, high-octane gas, but with a cheater cam and milled heads. Note the test date, February 3, 1967!
Here is another fun one, this from legendary engine builder Traco. The Traco team were a key element to Penske-Donohue success, starting with the Camaro and in many cars that followed. This is a fully built motor, likely representative of the power levels available in race trim back in those days. Must have been a hoot on bias-plys!
Still not going to say how my motor did despite it being an aspect of the car people like to speculate over quite a bit. It’s entertaining to see even if it’s not super relevant to the car’s competitiveness. In fact, you might almost argue for wanting to have less power, if the results of Terry Fair and their super-beast Mustang are any indication.
Bits & pieces
Was recently reminded of a little passage from the book that seeded the idea for this project. Even though it’s not from the Camaro chapter but the Javelin one, it describes well the phase of the project I’m in at present:
We started our first Javelin as a stripped chassis from the factory. We needed hundreds of other stock parts , though, such as hinges and brackets and linkages and thing, which are really quite a problem to order individually. For some reason American Motors didn’t want us to strip them off another complete car as they were needed. After we had installed the roll cage and widened the fenders we had to have some pars to continue with, and none we coming. I was getting desperate, so I called the factory and said, “Look, you’ve got to give us a car to take odds and ends out of. We have to have parts now! So they agreed to loan us a car, on the condition that we would rebuild it as the parts we ordered arrived. I was promising anything at that point. We picked up a running Javelin at a dealership and it got stripped … and stripped … and stripped … until it was virtually useless.
By the time we had the racer running the stripper was a pile of junk sitting in the corner.
Similarly, at this stage of the project, the Camaro is in needs of lots of odds & ends. The “kits” you can buy, to do things like the interior, don’t include several parts they assume you’re keeping. Things that aren’t really wear parts, but that tend to get funky with 45 years of age. Don’t want anything funky on this bird so everything is getting replaced or spruced up.
Instead of being able to turn to a fully-loaded “parts car” next door (which I could for a while when I owned two 240sx’s), I have to get online and order the part. Work on a particular oart of the car proceeds, gets stuck because of a missing part, so I move to something else, work until stuck at a missing part, and when the day is done, put together an order for all the missing parts plus anything else I can think may be needed. Not the most efficient method of proceeding.
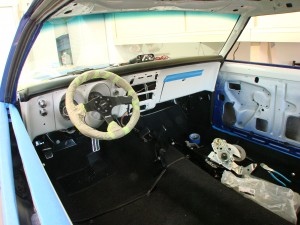
Despite this, the interior is progressing. Still waiting on the driver door window actuator mechanism to show up from backorder. Several of the other window components need to be thoroughly cleaned and either painted or powdercoated. Looking for replacement vent windows – earlier it appeared these were stocked by online retailers for a reasonable price, but it turned out not be the case…so now I’m stuck looking for the main chrome pieces to the vent windows.
Carpet and under-dash pad are in. Boo hoo hoo, weight from sound deadening. At least it’s low I guess. New painted factory gauge cluster is in, wiring is about done.
This car will be getting the full DL1 treatment, as the 240sx did. Also have the Chasecam camera fully wired mounted up where the dome light goes. So many car videos are from bad positions – on the dash, roof, or on the front bumper. While better than nothing, these videos are only about 10% as useful as a video showing the driver’s inputs. A vantage point that shows the road ahead in addition to the steering inputs from the driver is the best, it really gives you the right kind of perspective to understand what’s going on, and how the car is behaving. Dome light should be a good spot in this car.
The back seats have been upholstered and are ready to go in, but they can’t until the rear quarter windows have been fully installed, and I’m waiting on one sneaky trim piece to complete that step. Then onto the front windows, front door panels, headliner, and remaining trim.
