Alternator mounting wackiness
A couple things conspire to make mounting the alternator in this car tricky.
First, is the lack of allowance to change the mounting at all. There are simple bracket kits out there to relocate it to the passenger side, which would help weight distribution, but of course this would not be allowed under our rules.
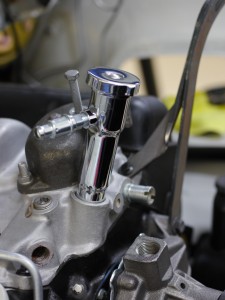
Another problem is the method used in the early Z28, was somewhat unique to those years. The cylinder heads weren’t yet provided with the mounting bosses, so big wacky brackets off other parts of the engine, is the way. Here you can see how the upper portion is a 2-part bracket pair, with one part hanging off an intake manifold bolt, the other shared with a water pump bolt. This photo was meant to show off the oil fill tower, but of the ones I took it best shows how the brackets attach:
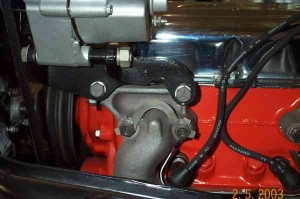
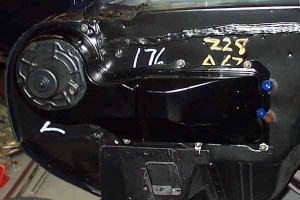
The parts are available to reproduce that part of the alternator mounting, but one more challenge awaits. The picture here I borrowed from the site 67z28.com and the excellent photo restoration done there. It illustrates how the alternator attaches to the engine at the bottom. A cradle bracket, which affixes via two bolts, to a threaded part of the exhaust manifold! Arrgh.
I have the black bracket pictured, but obviously my aftermarket headers are not going to have the provision to attach that bracket. I’ll need to get the precise factory measurements, and modify my Swain-coated headers (due to arrive back tomorrow) with an additional welded-on piece, to allow me to hold the alternator bracket in this exact same way.
Funny thing is, I’ve seen some pictures of the headers originally offered with the early Z28s, and they had that part on there, a simple rectangular bit welded to the flange.
Pulley weight savings
I don’t have a set of original 302 Camaro pulleys to compare to, but I suspect I’ll be able to save a bit of weight with an aftermarket set. Purchased the kit from March Performance. It is reasonably priced, made of billet aluminum instead of chrome, and has deep grooves for the v-belts. These cars have a reputation for “throwing” belts at high rpm, and the deeper pulley grooves help this.
March also has a ton of wacky serpentine conversion kits to move it all to a modern single-belt system, but alas, this would not be legal.
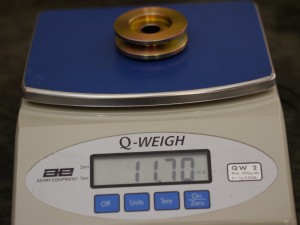
Only have the alternator pulley for comparison. I guess technically this is a generator since it has an external voltage regulator, but anyway, the stock one-
Felt heavier than it looked. Probably some kind of plated steel.
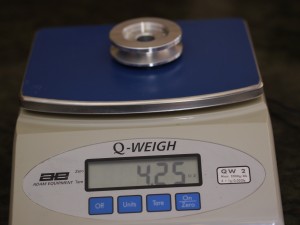
March billet aluminum equivalent:
7.45 ounce difference – almost half a pound! Pretty significant for a pulley only about 2.5″ in diameter. Besides being up high and forward of the front wheels, this thing also turns much faster than engine speed, due to the diameter difference from the crank pulley. So three wins on the weight side for this pulley. Will be using the March pulleys for the remaining pieces – crank pulley (2-belt), water pump pulley, and power steering pulley. Since the other pulleys are all larger than this, I suspect this will add up to several pounds of rotating weight off the nose, a great help!
Driveshaft in
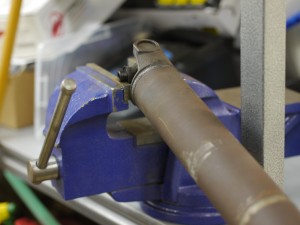
The driveshaft was one of the few things I haven’t had to buy, the unit in the car was correct, stock, and appeared in decent, if dirty, condition.
Still, wasn’t going to put a rusty, covered in red overspray, worn out driveshaft under the clean car, even if it is bound to get thrashed.
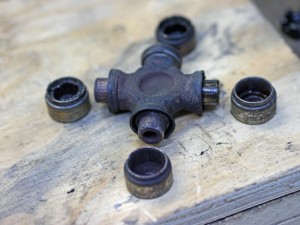
Banged out the original u-joints. They didn’t look too bad actually. Since the car had an open 3.07 rear, maybe it hadn’t lived too hard a life?
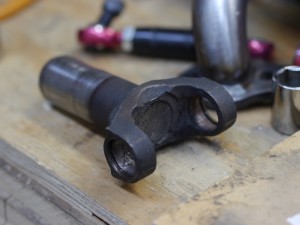
Transmission yoke – funky but usable
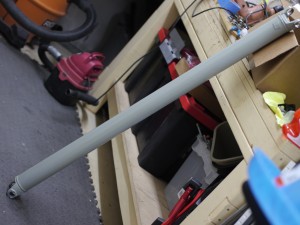
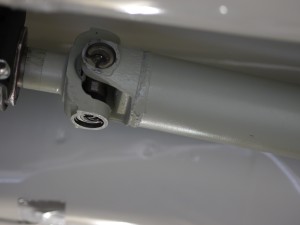
Cleaned it all up with a bit of steel wool and degreaser. Hit it with some primer and some light machine gray rattle can, resulting in a decent looking part-
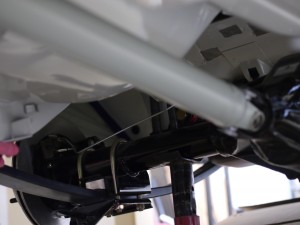
And installed in the car – these pictures aren’t very good, but you get the idea-
This part wasn’t too hard, and is a prerequisite to hanging the exhaust system, which is here now.
Intake Irony
Received an email last week from Vorshlag race shop owner Terry Fair, about a possible problem with the Camaro. I do love getting these sorts of mails, seriously! One has already helped me spot a problem that may need fixing (offset axis of my front lower control arm bushings). This one began with-
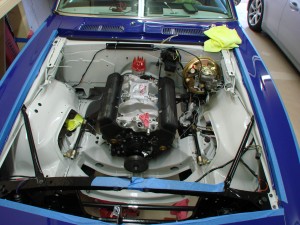
A friend of ours who is a 1967-1969 Z28 expert (Ed, cc’d here). We showed him your build thread, which he loved, but he noted one glaring missing item underhood within 15 seconds…
It then pointed to this photo:
and continued-
He saw this picture and said “Its missing the hole in the firewall for the cowl feed air cleaner inlet”. Apparently this is only on the 1967 Z28s. I had never heard of this but we did a google search on “1967 Z28 cowl” images, and sure enough…
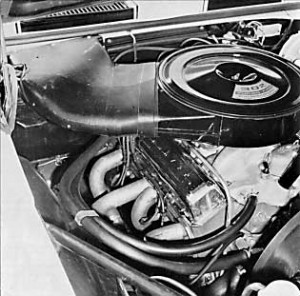
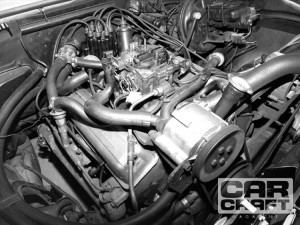
Then followed some photos, which I’ll include here:
The second one is from a Car Craft article – Car Craft photo source – check it out there to help with their ad revenue!
He said these were cut at the factory with an air chisel, but that is accurate. You can see the edge of the hole in the first link above with the dual-quad air cleaner removed. Of course you don’t need to run this exact air cleaner (and you can’t find one for any amount of money), but that hole probably needs to be there. Somebody will notice that missing.
You might already know about this, just wanted to pass that along. Keep up the good work – love this blog!!! 🙂
###
The cowl air cleaner is an entertaining bit of original Z28 lore. Ed contends the firewall holes for the air cleaner were cut (coursely, it would seem) at the factory on all ’67 Z28s. Terry extends this to say, that I need to have the hole, since it would have been part of every ’67 Z28 chassis, even if I don’t intend to use it.
The irony here, is I would love to cut that hole and run my intake like that, but I can’t, because it wouldn’t be legal! 🙂
The truth is, that intake option was available from the factory, but it was delivered as one of the earliest examples of what the SCCA calls (rather appropriately in this case) a “trunk kit”. Trunk kits are defined in the SCCA rulebook as “post-factory performance kits”. Frankly the lines on what is and isn’t a trunk kit is a bit confusing to me, as some recent cars (Mazda MX-5 MSR and Pontiac Solstice Z0K) have been deemed legal with some trunk-kit type suspension stuff.
Not a huge deal here, as I can probably find another way to accomplish a good cold air intake. Still, for as unsophisticated as many parts of this car were, the orignal 1967 cold air intake design is actually very good – pulling cold air from a high pressure area at the base of the windshield, without a lot of complex routing. Also alleviates the need for a big ugly scoop on the hood – not a fan of those for their looks from the outside, and for what they do to visibility from the inside.
You could get this intake kit as a service part from your dealer, or as part of RPO package “Z28-2” ($75 more than the regular Z28 option) or in RPO package “Z28-4” (which also included headers, also in the trunk, for $475 more than the base Z28 option). Some of this information is available here in a compiled list of first-generation Camaro options: First generation Camaro options (itself borrowed from the great group at the “Camaro Research Group” http://camaros.org/options.shtml#RPOSpreadsheet )
Jerry MacNeish, published author on first-gen Z28 information, goes into further detail in his book “The Definitive 1967-1968 Camaro Z/28 Fact Book” (available here: http://www.z28camaro.com/publications.html )
For the Z/28, the cowl plenum air cleaner was available as a regular production option or as a service part. With an RPO Z282 package, a Z/28 would come with the cowl plenum air cleaner shipped in the trunk. An RPO Z284 package would provide a Z/28 with the air cleaner and set of exhaust headers.
…
If factory ordered, the air cleaner was shipped in the trunk with installation instructions that showed where to cut the firewall hole. The method for cutting the hole was left up to the installer.
Jerry even includes a full-page image of “Instruction Sheet Identification No. C916621”, which details the placement and what size holes to drill for the attachment screws. You can be certain Jerry’s book will be riding right alongside my collection of factory manuals, to assist in the event of the car being protested. 🙂
Not wanting to trust only a single source of information – and frankly, also out of hope I could find an opposing bit of data to justify running this intake myself, I’ve researched this a ton on my own. Unfortunately everything I’ve found supports Jerry’s stance, it was a factory option but had to be dealer or user installed. I’ve also found good evidence of original ’67 Z28s without the hole present, further contradicting Ed’s belief, that the holes were factory cut. One such place is this excellent Z28 Restoration Chronicle – featuring this Z28 Restoration Chronicle – firewall pic
I’ve gone back to that site countless times to review things like brake line routing, shifter hole placement, etc. It’s extremely good, even though the pictures are a bit lower resolution that I would like, or than we’ve grown accustomed to in 2010+. In the picture above you can see this original ’67 Z28 Camaro firewall, without the cowl plenum air cleaner hole cut.
So, I can’t run it, but would really like to. The original Trans-Am guys ran it single-carb in ’67 and into ’68, and later ran a revised version that fit the dual-carb induction setup Chevrolet homologated.
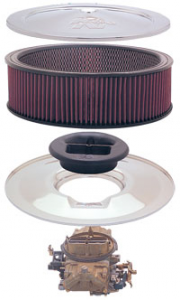
An interesting observation in researching alternative cold air intake (CAI) solutions for the car, is how little attention people seem to have paid to this aspect of performance in these cars. My impression was if you asked a hot rodder what “C A I” stood for, providing the hint it had something to do with the intake, they’d probably guess “Chrome Air Intake”. You can find 10,000 different chrome air cleaner lids for these cars, but practically nothing built for performance, short of some tall intake stuff designed to work with monster hood scoops.
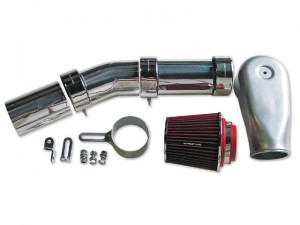
One thing I have found is this, made by Spectre Performance:
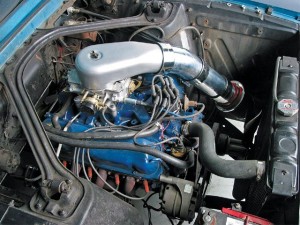
Installed in a classic Mustang, from an article at MustangsAndFords.com:
This sort of intake looks a little bit funny on a carbureted car, but should work. They have a kit now for the first-gen Camaro with a little blockoff plate, where the filter goes in the front passenger corner, the original home for the battery. Carburetors are a bit like MAF (Mass Air Flow) sensors, in that they expect the air they ingest to come from certain paths and angles. Not sure how this sort of kit would affect things.
Another option is from K&N, they make a device they call the “Stub Stack”, a small velocity-horn-esque component which sits above the carburetor:
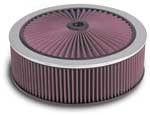
That sort of device should be legal in ST, since it operates before the carburetor inlet. They also have these XStream air cleaner lids, where the top becomes an additional filter element:
But haven’t really been able to find any good third-party test results for any of these things. The old world of small-block-Chevy engine tuning seems lacking in some of the basic A-B scientific part tests we expect to see on modern platforms. They could be junk.
So, as of today, still not sure what I’ll do for induction. Even with the Swain coating on the headers, it’ll be hot underhood, and I’d like the engine to retain consistent performance when being run hard. The factory trunk kit piece would be perfect from a performance, simplicity, and classic authenticity point of view, but unfortunately I don’t think it can be considered legal, despite many many hours of research, looking for an angle where it arguably could be.
Many thanks to Terry, Ed, and the Vorshlag crew for their thoughtful message. I’m sure they can appreciate the amusing irony, or being called out for not running a part, you wish you could!
STX thrust comparison 2012-2013?
A recent thread on the new Toyota Scion FRS & Subaru BRZ on roadrace-autox.com took an interesting turn around post #3680, when someone opined on where the car should go in the Street Touring category.
Now that Street Touring has moved from seats-and-displacement based classing, to one relying on subjective assessment of vehicle performance, there are many places where a given car could land. As a normally aspirated and lightweight 2+2, the FRS/BRZ could fit in many of the classes, and every single one – STC, STS, STX, STR, and STU, have been mentioned.
A good bit of the discussion was on how the car would fit in STX, given how similar it is to the RX8. Some dynos were shared and thoughts on acceleration given.
Since I’d already collected the data for some other STX cars, it was not too much work to provide an STX-centric thrust spreadsheet, which I’ve linked to below here.
There’s still a lot unknown about the FRS/BRZ, including what size tires it can fit. Feel free to download this spreadsheet and make adjustments as you see fit.
Based on what I’ve seen so far, the accelerative capability (which by no means dictates in-class performance!) looks to be on par with the RWD class leaders in STX. The BMW 328 appears to have a slight edge over 55mph, and the Scionaru would appear to have an edge at very low speeds (~25) which could possibly be an edge up to 35mph if there were a way to tune out the torque dip. These all pale in comparison to the nearly-forgotten WRX, which dominated the class for so long but has been out of favor in recent years.

The sample data I’ve provided here for the Camaro includes a very optimistic curb weight, and dyno numbers from a magazine engine build, that are possibly somewhat representative, but certainly not identical, to a stock-legal engine build for the same motor.
