Couple videos of first drive
The family was kind enough to come outside and do some camera work as I maneuvered the Camaro out onto the street:
http://www.youtube.com/watch?v=kmWIYpJrp8A
and around the block:
http://www.youtube.com/watch?v=ET-FRcrcH-w
for the first time.
Fortunately the car made it off the crazy curb we have without scraping anything…not sure the story would have been the same with the subframe connectors still in place.
In the first video it is amusing to see how freely the rear axle articulates as the car descends the curb/gutter. That’s what having zero rebound will do for you! 🙂
Embarrassingly, I did stall the car on the driveway (mostly due to a small wheel interference issue I’ll soon fix) – and the lesson there, was it needs a new battery. I’d let the PC680 in it now run down a couple times, and while it will rise to and hold a normal voltage, it doesn’t deliver diddly-squat when it comes time to turn over the motor. Even with a plug-in battery tender/jump-starter at its max 80A setting, the motor wouldn’t turn over after the stall. I thought this was some kind of dreaded starter heat-soak issue, but as soon as I supplied a battery-based jumpstarter multi kit (which is also an air compressor, light, and 12V DC/110V AC power source) it turned right over and fired.
Given how much a pain getting it going in that situation was, I’ve decided to go to a much larger (and unfortunately, heavier) battery for the time being – an Odyssey PC1200. At 38 lbs. it’s about 2.5x the weight of the PC680, but delivers over 3x the reserve and more than 2x the cold-cranking-amps needed to get this high compression motor turning. Will have to save the 4lb. lithium-ion PC680 equivalent for Nationals.
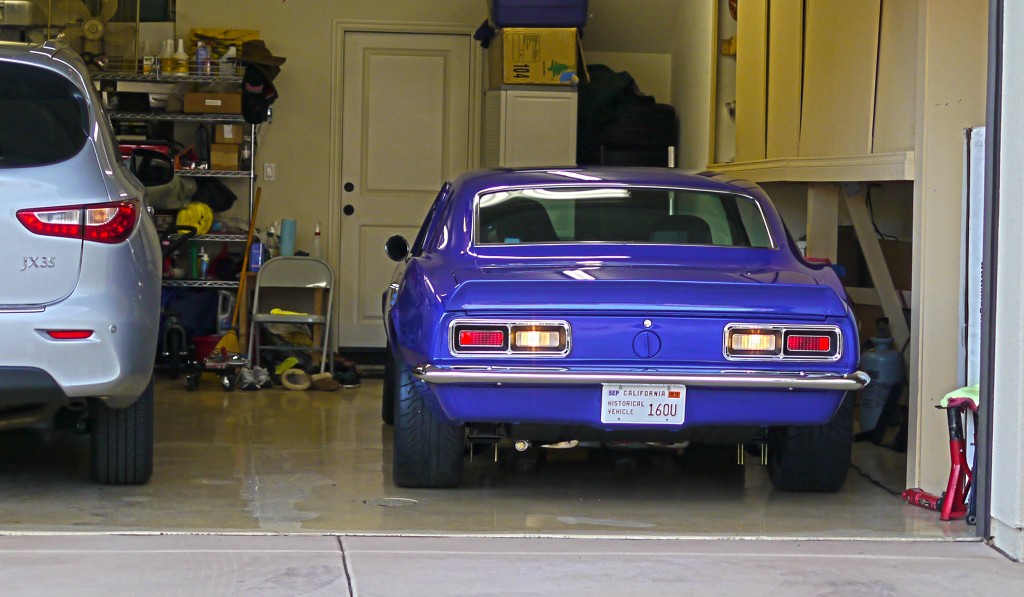
Oh! I have slipped the surly bonds of … the garage
This pic is funny to me, because of how much I like seeing the reverse lights. How they worked was actually a mystery until the last couple weeks, when suddenly a curious hole in the filewall, a lonely connector under the dash, and a few parts I hadn’t yet ordered, all came together. It’s a good feeling to be closing out all the remaining mysteries I had for how one of these things goes together, and given the amount of head-scratching that went into it, I’ll never take reverse lights for granted again.
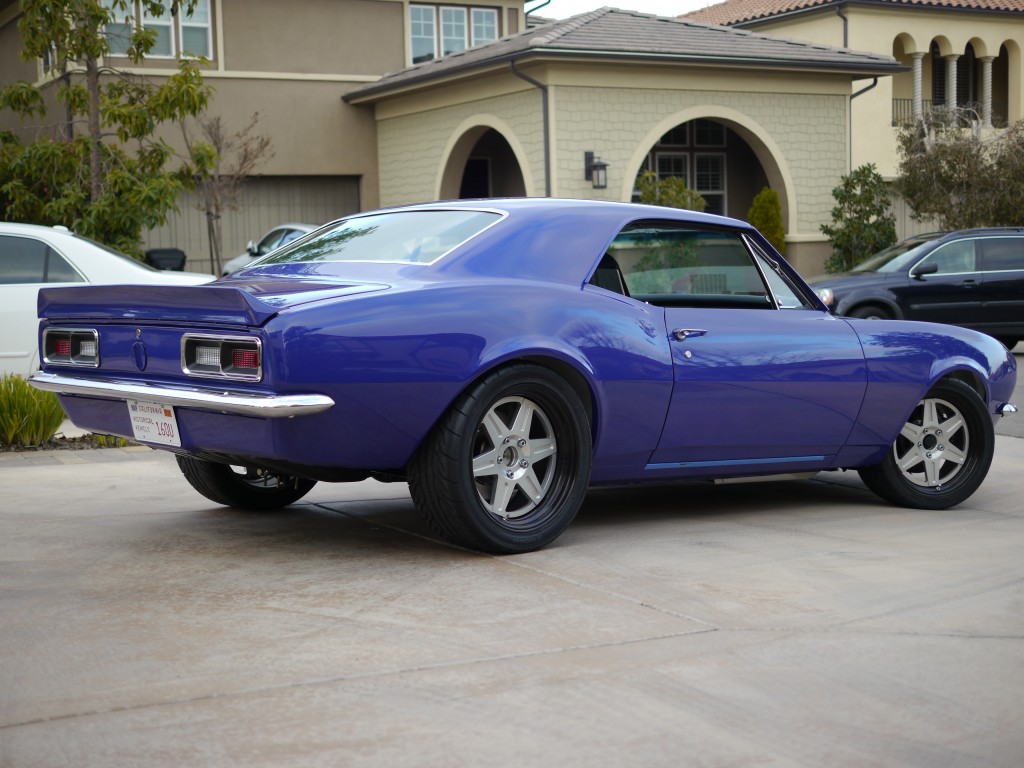
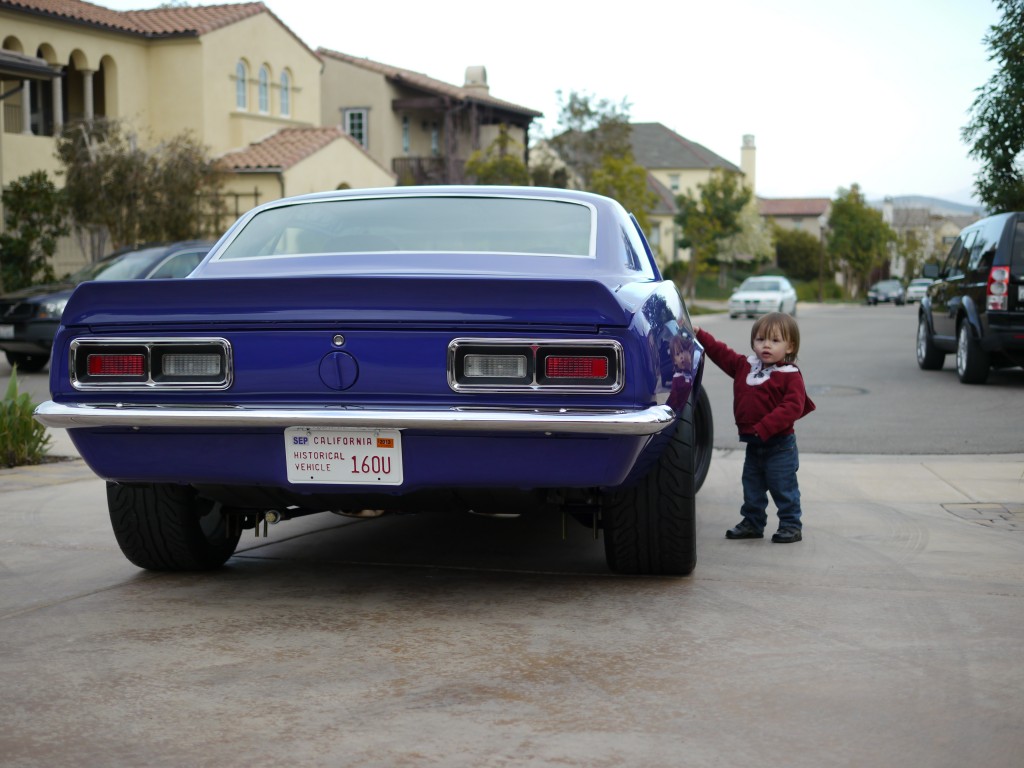
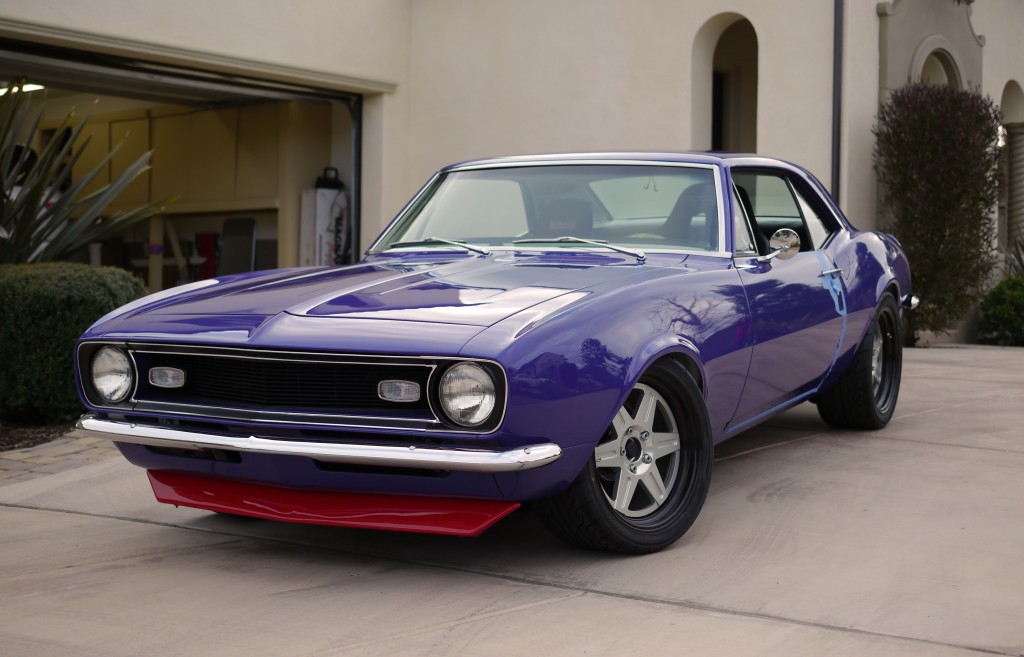
Once out on the driveway took a few shots…leaving a little of the blue tape on for a while since the door glass isn’t done yet, it detracts somewhat. But I think finally, the ride heights are at a pretty good place, a decent starting point anyway.
Had some help of course!
Did get a couple little videos, will get them posted soon.
Watt a pain in the…eye?
Well, that was an awful weekend last weekend.
Thought I’d gotten through all the really gnarly work, but prep for the Watts turned out to be one of the toughest weekends yet, for a few reasons.
One, it was unusually cold in San Diego – not that it ever gets really that cold here, but there was a frost advisory with overnight lows in the 30’s. Enough to make lying on the garage floor feel a bit like lying on a hockey rink…
Two, it was a bit challenging psychologically. With composite leaf springs in the rear, the car has to have some kind of dedicated lateral axle locating device. I set out to cut away a perfectly good one, that somebody had worked really hard on, to do something else that might be only a little bit better. And if I ran into some kind of bad gotcha, that could delay things significantly.
But lastly and most of all – it was the crap! The crap that flew everywhere as I cut away all the metal for the panhard – off the axle, off the chassis. Went through about 15 cutoff wheels on my 4.5″ angle grinder.
It seemed like no matter how I positioned myself under the car, how I set the tool’s guard, and what direction the shower of sparks was flying, it all landed on me. In my face, in my hair, and on several occasions, the searing hot crap seemed to find its way behind my tightly-strapped unvented goggles, right into my eyeballs. On several occasions I had to stop and dig out what landed there. Next time I’ll have better face/eye protection!
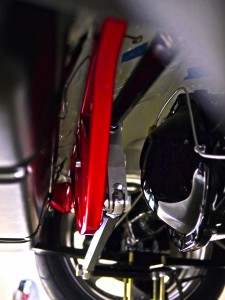
John had done a very nice and thorough job ensuring the panhard had a solid base to work from….which means it took a ton of effort to get enough of it out of away, for the Watts to go in cleanly. Once the panhard was out of the way, the Watts was pretty straightforward.
The unit bolts in, consuming the space behind the rear axle, where the factory originally packaged the muffler. (Overall exhaust packaging beyond where it is now, is going to be difficult. Will need to do something more, under-car dumps are kinda ghetto, and the car is a bit too loud still.)
The propeller for the Watts has 12 positions of possible adjustment, comprising roughly a 6″ range of rear roll center heights. Fays2 recommends starting at 4 up from the bottom for “most people”; I started 8 up from the bottom, seeing as my car is 1-2″ lower in the rear than most people run.
They recommend installing the center pivot bolt from the rear of the unit – problem with that, is you can’t fit it in (except maybe on the lowest adjustment hole) with the fuel tank in place. Even if you put it in the car with the bolt already pushed through, you wouldn’t be able to adjust the roll center height later without either pulling the Watts unit, or the fuel tank.
It’s funny too – in the early part of the instructions there is no mention of fuel tank removal, just wheels and normal stuff. But then later around step 8 there’s a “now you can reinstall the fuel tank” line…seems like some selective editing.
Anyway it worked out ok for me – the propeller comes with a number of spacers allowing you to move it forward if needed, and defaults to one. I ended up taking out that one spacer, which puts the center pivot bolt through the Watts frame on the shank of the bolt (instead of the threaded portion), so it should be just as good. And this way I can adjust if needed!
On the driver side, the propeller runs to a new plate sandwiched below the spring and the factory lower spring plate. On the passenger side, it runs to a new axle-clamping tube. With these things, it’s important to get the angles and lengths identical from side to side; otherwise you end up introducing lateral movement, or other weirdness, into the suspension motion. I ended up with link length of 16.5″ and an angle of 9.6 degrees from horizontal, running “downhill” away from the propeller.
Bounced the suspension a whole bunch (easy to do, still no shocks) and there is no perceptible lateral motion or bind in the system. Will be interesting to see how it holds up to the world of autocross!
First race entry
The SCCA San Diego National Tour is coming up March 30-31 – this is my home event on the SCCA National Tour series, and will probably be the car’s first live autocross. That only leaves 7 and a half weeks to get this thing together!
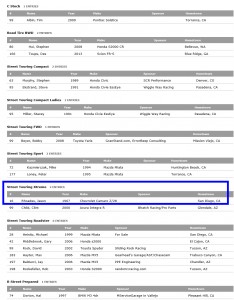
To put extra pressure on its completion, went ahead and registered now – so here is the car’s first appearance on an autocross entry list–
Entries are still a little light as of today – most people register in the few weeks just before the event. There are 30 registered at the moment, should be 300+ by the time registration is complete. The 2 entrants in the STX (“Street Touring Extreme”) class should be 12 or so come race day.
Still a lot to do, though the to-do list is slowly shrinking.
Watts up with the Camaro?
A long time ago there were some posts on the panhard rod I had built for the Camaro:
http://www.rhoadescamaro.com/build/?p=793
http://www.rhoadescamaro.com/build/?p=866
The reality is, if that had been the last project before the car’s completion, I probably would have gone with it and been perfectly happy.
But lots of time has passed, and I’ve had more time to think about it, and some of the imperfections of the idea chipped away at me.
One thing bugging me, which isn’t the panhard’s fault, is it was tied to this axle with its welded-on components. It hadn’t occurred to me back then, but I’ve since realized, it might be nice to be able to swap out complete rear ends to change final drive ratio. This could be for damage repair, or between venues like autocross and track. By keeping the lateral locator bolt-on, it enables easier swapping between rear ends.
Another, totally my fault, is I probably had John build the panhard rod backwards. The way it was built, mounting to the axle on the left and the chassis on the right, improves grip in left-hand turns, but worsens it in right-hand turns. Totally the right thing to do for circle track, but not necessarily autocross – autocross tends to be fairly neutral in left/right turn distribution, but there are other things about a live-axle car that make it favor left-hand turns (to the detriment of right-handers) and this mounting approach amplifies this disparity. Should have mounted it to chassis on left, axle on right.
The last thing, is I’d always had in the back of my mind, might like to change to a Watts later at some point. The car will be headed into the exhaust shop soon, and I’ve decided it’s better to have the rear in a more final state, for that part of the process. Don’t know if I’ll be able to get the exhaust to exit the rear of the car, but if it can, want to have it do so now, with what is more likely the final rear lateral location solution.
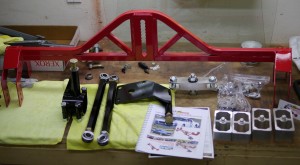
So I bought a Watts. Fortunately this was a pretty easy choice in the aftermarket, there appears to only be one standalone pure bolt-in Watts kit, made by Fays2. Very reasonably priced.
It’s pretty straightforward – the red (only color offered) crossmember piece bolts to the rear frame rails. A central propeller rides in one of the overlapping holes in the center of the unit, allowing ride height adjustability over a ~6″ range, in 1/2″ increments.
Total weight is a little higher than the panhard setup, though fortunately the weight isn’t in a terrible spot (low and rearward) and the crossmember portion should theoretically add some stiffness to the chassis. And of course, it should bring the innate benefits of a Watts over the panhard – elimination of axle lateral movement through suspension travel, and more consistent handling behavior in left and right turns.
###
Since switching from the panhard is going to be a bunch of work – requiring removal of the rear end, cutting away all the nicely welded-on work John did (I’m sure he’ll be laughing at me when he reads this!), and installing the Watts, might as well make a couple other little changes while it’s apart for the umpteenth time.
One plan is to modify the front spring eye bushings – they are mostly as they arrived from Flex-a-Form, and in their provided design, they offer quite a bit of lateral stiffness to the spring, not allowing the end to move at all. This comes at some cost, they also bind the end of the spring a little bit as it looks to rotate in normal suspension travel. With a good lateral locator like a panhard or watts, you no longer need the leaf springs themselves to provide the lateral location. Once could argue you could even go to spherical bearings in the spring eyes, but I won’t be going that far. Will just be trimming the bushings, so they still provide good longitudinal location of the spring eye, so they still transfer drive, brake, and wind-up forces quickly and securely to the chassis, but remove the lateral pieces. This should reduce/eliminate bind in the front, and maybe save an ounce or so!
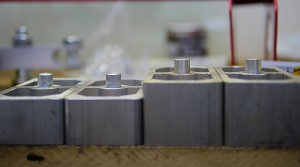
The other plan is to “adjust” the rear ride height lower. Since the rules disallow changing to coilovers, have to manage ride height through leaf spring spacer blocks.
The car has 1″ units on it now – on the left are 1.5″, 2″ on the right. Will be going to the 1.5″ to see how that looks/feels, that way can go up or down a little as needed.
With larger spacers, the axle gets “further away” from the spring, which makes it more difficult for the spring to control axle wrap-up forces under acceleration and braking. I’m hoping the relatively modest grip from street tires, modest rear tire size, and a relatively stiff/thick rear leaf spring, will keep those motions under control.
