Caswell zinc plating and blue trivalent chromate
One enjoyable aspect of working on cars is taking something funky and making it nice and clean again. With plastic stuff that usually means throwing out the old and buying a new, but with metal, especially decent metal, there’s usually something you can do to “bring it back”, without having to buy a new part. Plus it’s fun to use as much of the original car as possible.
With the 240sx I had a lot of the suspension components powdercoated. Powdercoat is a much more durable finish than paint , available in a variety of colors and textures. Being a thick coating, it adds a little weight, and won’t work anywhere you have tight tolerances, like in a fastener or on two tightly mated surfaces. I plan to have several things on the Camaro powdercoated. RW Little is a place in San Diego I’ve gone to many times that has good prices and reliably quick turnaround.
Since building the 240 I’ve learned about how DIY’ers can apply other sorts of finishes to their metal parts at home. Another very popular coating in automotive applications is cadmium plating. This is often seen in brake boosters but also in some suspension components, on fuel pumps, or carburetors. The cadmium plating offers excellent corrosion resistance, and a neat yellow sheen when new.
Caswell plating has a range of kits to do all sorts of platings and coatings and anodizing at home. Standard cadmium plating involves some very toxic chemicals and is pretty much banned in CA. Caswell has a good alternative, their “Copy Cad” kit. With it, you apply a standard zinc coating, then dip the parts in a trivalent chromate, leaving the parts with a nice sheen. The most popular is the yellow chromate, which ends up leaving the parts looking just like a freshly cad plated part.
The plating kit arrived last Friday so I got to work-
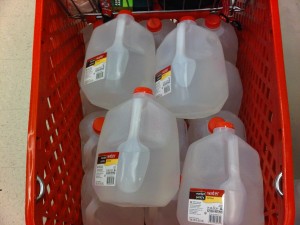
For all of this, you need distilled water. Needed to go to Target anyway, so we loaded up the cart with 15 gallons.
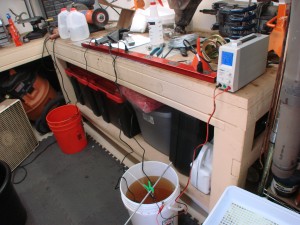
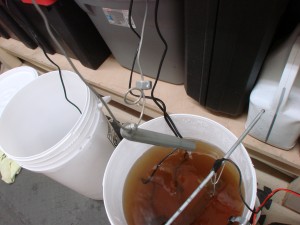
There’s four buckets you need to do this-
One is a degreaser bucket, orange bucket in the pic below. The degreaser is supplied as a powder to get mixed with distilled water. Parts go in this after they’ve been prepped as a final cleanup stage. This stuff needs to be heated up over 110 to work its best.
Next is a rinse bucket. You use this to rinse the parts after degreasing, and any time you’re moving parts between the other buckets. Mostly you just hold parts over this bucket while spraying them with water to rinse between stages. You can see the edge of the black bucket there, my rinse bin/bucket.
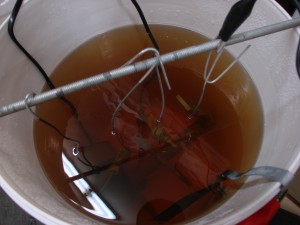
After that they go in to the plating bucket, the white bucket with brown water in it. This bucket gets a bunch of a different powder, and some gnarly brown liquid mixed in. All this stuff is supposed to be pretty safe as far as plating operations go, but note the large box fan to the side. 🙂
The plating bucket gets heated also to about 140. It also gets an agitator pump to keep the fluid circulating within the bucket, which helps the plating process.
The last bucket and step (after another rinse) is the chromating process. Again, this stuff mixes with distilled water. Instead of the old-hat yellow, I opted to go with a blue chromate. It is a little bit less blingy, and a little bit less resistant to corrosion (not that the car is going to see much bad weather ever again), but I like the more understated end result.
To get plating, you suspend the part you wish to plate by a wire. Inside the bucket you place a large-ish sheet of zinc, which you connect to the positive terminal of your power supply. To the negative side, you connect the wire holding the part(s), and away you go. The power supply I’m using goes a bit over 5 amps and is of a constant-current design. Parts stay in the bath for 20-30+ minutes, depending on the size of the part and the desired thickness of the coating.
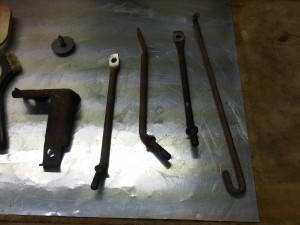
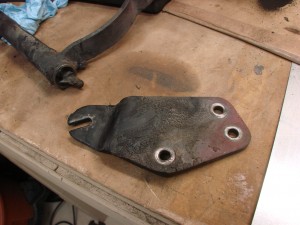
I decided to start off with a few small parts that aren’t really visible, the three “hangers” for the steering column. Mine were filthy and rusty when I pulled them out of the car-
(Sorry for the cell phone pic, left regular camera inside that night)
In with them are a brake bracket, and the underbody emerbency brake assist hanger thing.
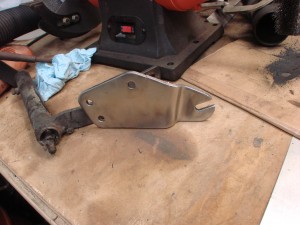
Before the plating process can begin, you need to get the parts down to bare metal. For most of this I used a wire wheel on a bench grinder.
They actually look ok at this point, but left alone, would be back to a rusty funk in very short order.
So into the degreaser, then a rinse, then into the plater. These are some of the clutch mechanism parts I decided to do later, never got a photo of those things in the plating bucket.
Once out of the plating bucket, the parts have a dull gray zinc coating. There is a “brightener” additive available but I didn’t use much of it, didn’t want the parts too shiny.
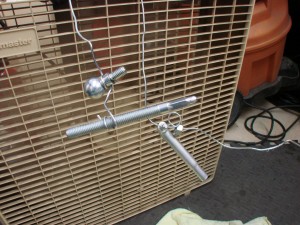
From there a rinse and into the chromate bucket for 30-60 seconds. A final rinse and hung in front of the fan to dry-
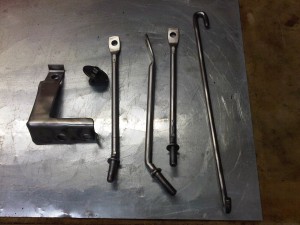
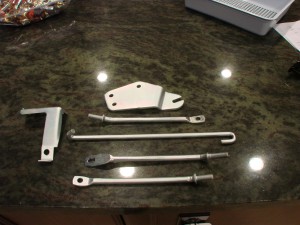
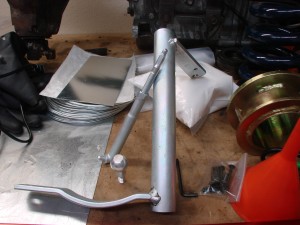
Overall I am pleased with the end results. I don’t quite have the power supply…power to plate the big clutch lever as well as I would have liked. I also didn’t get every last fleck of paint off the original parts, using a bead blaster or sand blaster might have been more effective there than my wire wheel. The pictures don’t capture very well the subtle iridescence of the blue chromate, but it looks quite cool in person.
Here’s some before, during, and after pics of a few parts
This update isn’t totally car related, but other progress is being made, just have to wait for progress updates in other areas. Can see some clues based on doodads visible in some of these pics.
[…] Caswell zinc plating and blue trivalent chromate « J-Rho's '67 … […]